
Product Grouping
Feature Availability
Available on Web/Mobile Browser only.
Introduction
Product Grouping is specifically for SmartPour co-branded settings. Users can opt to create a Product Group from an existing list of owned products.
Create Product Group
To create a new product group, you can:
Steps | ||
|---|---|---|
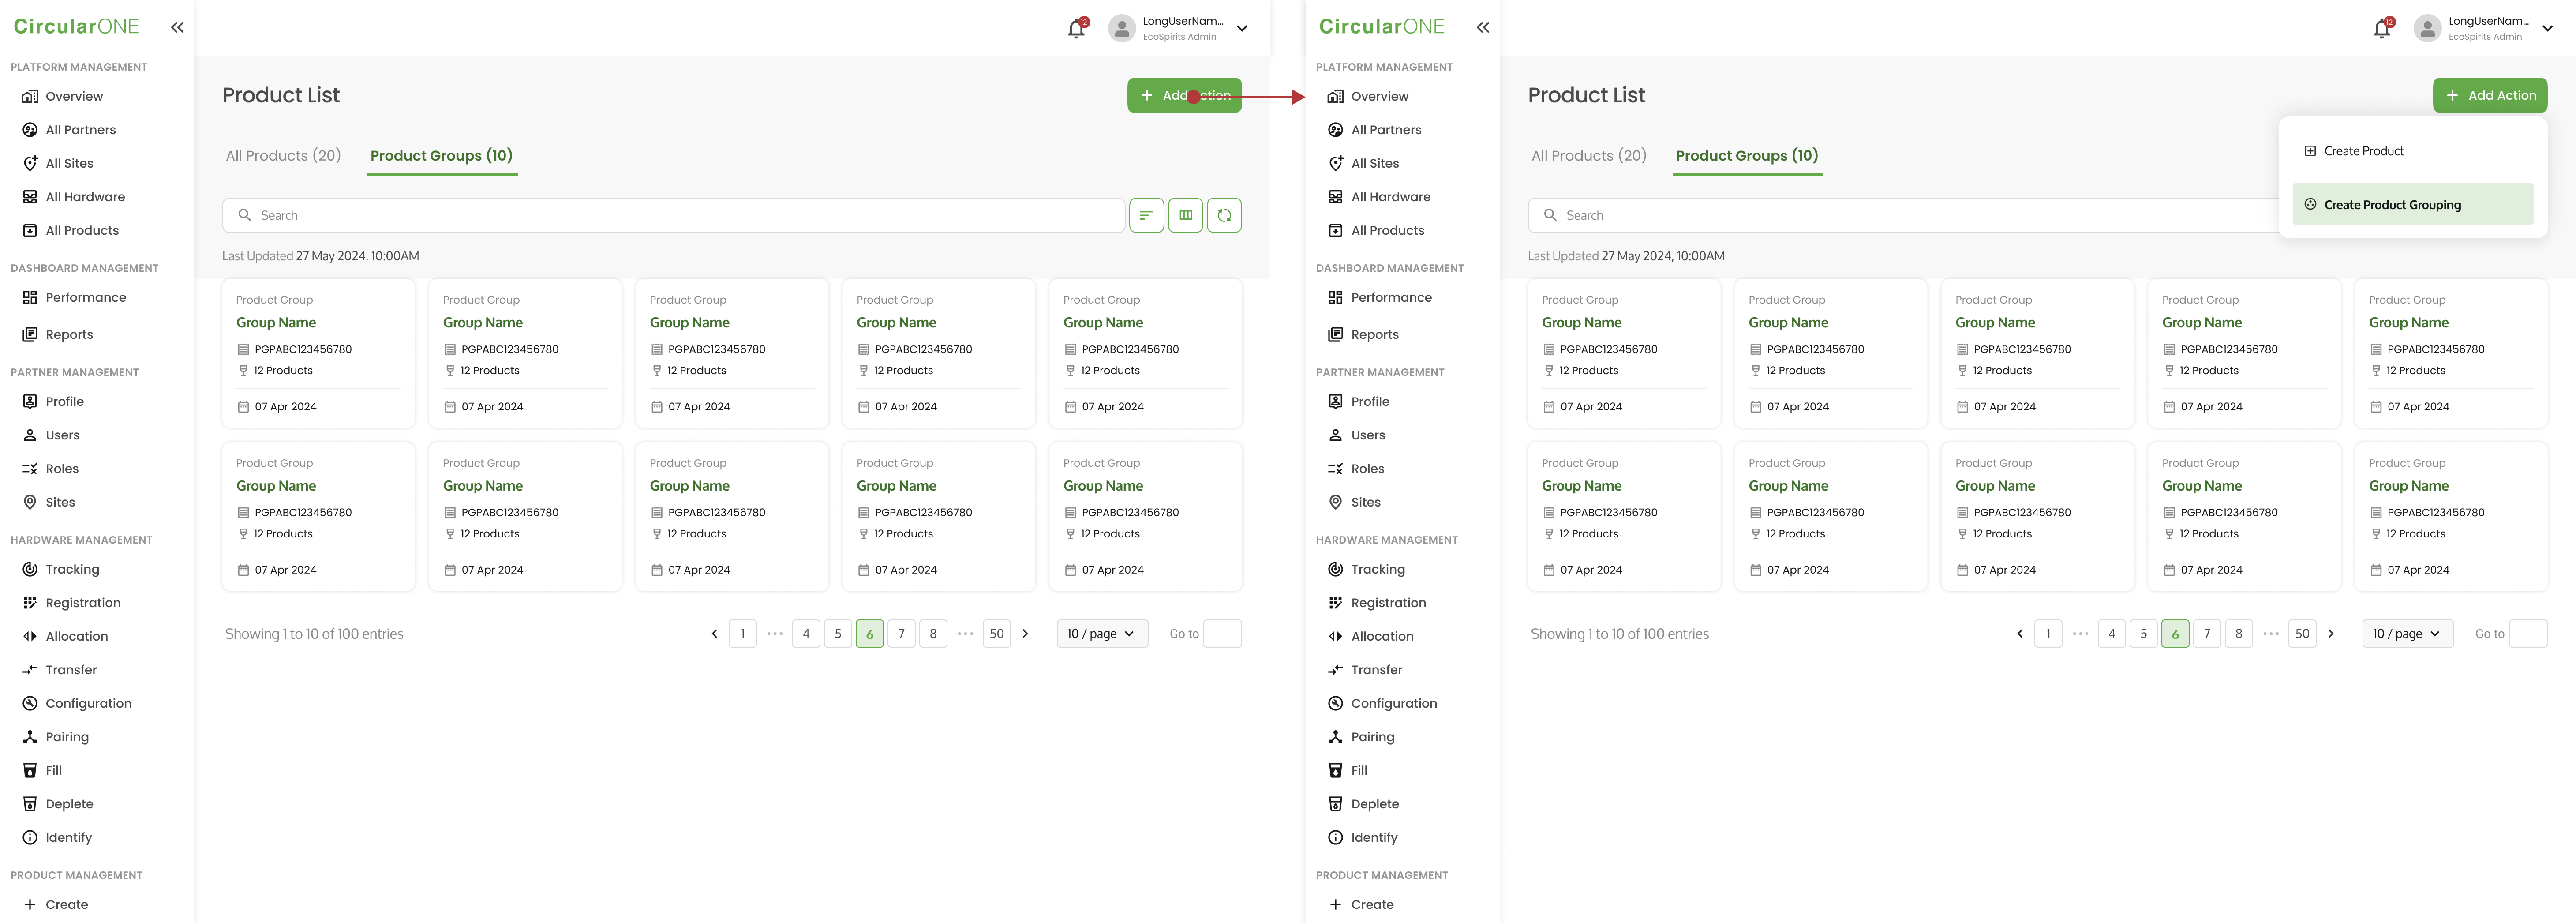
1 | Head to ‘Manage’ under Product Management | |
2 | Select ‘Add Action’ and click ‘Create Product Grouping’ | |
| ||
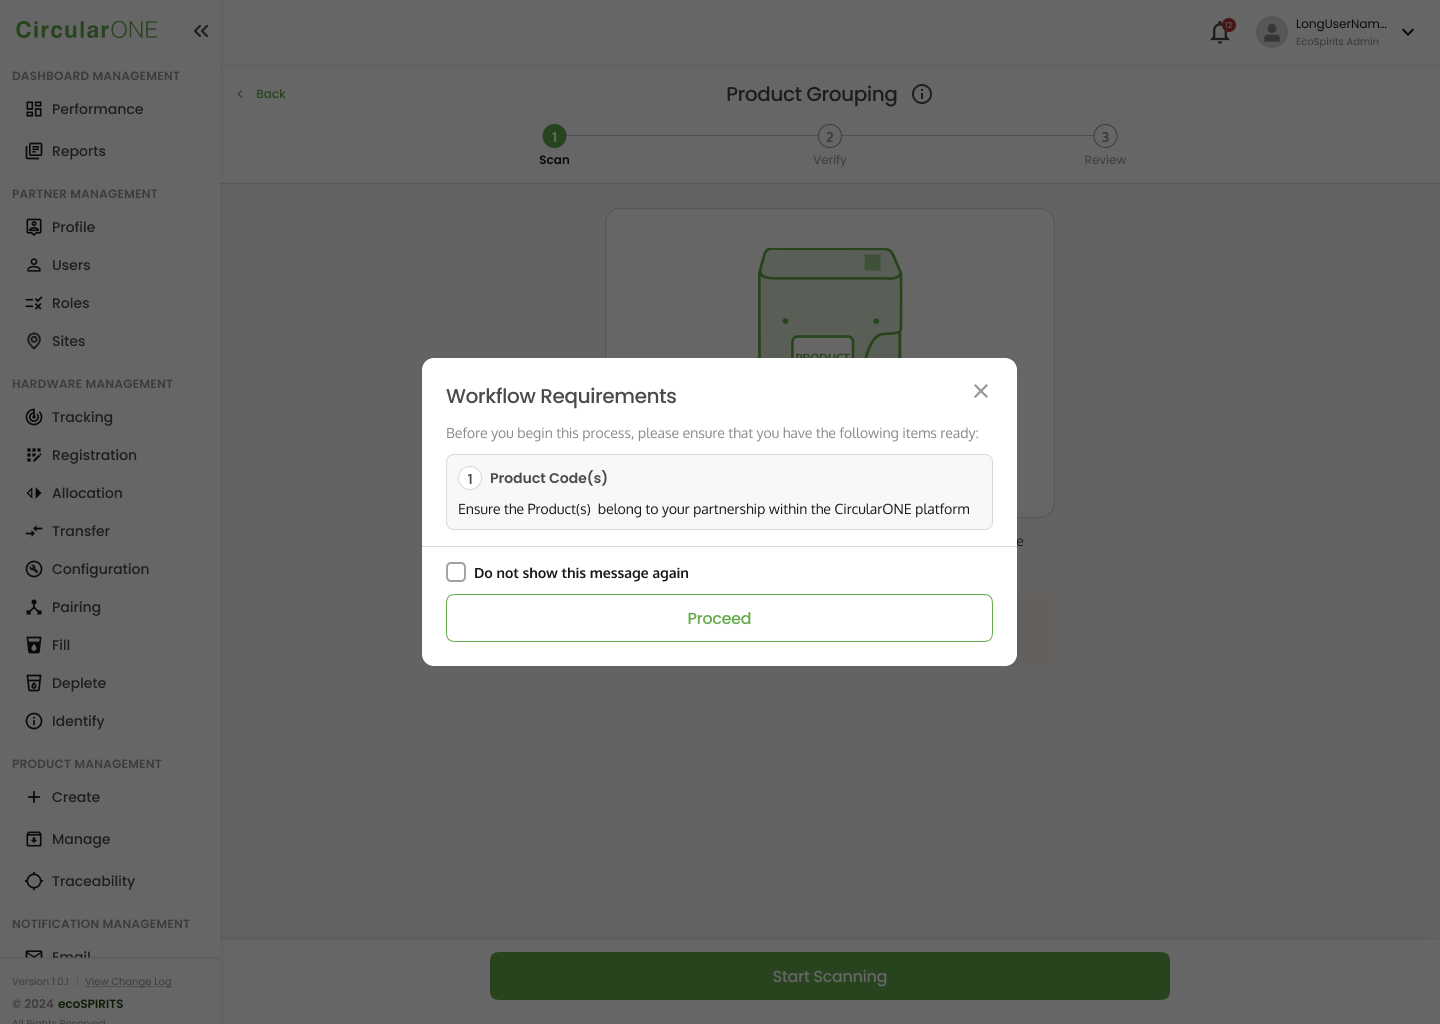
3 | View the workflow requirements | |
| ||
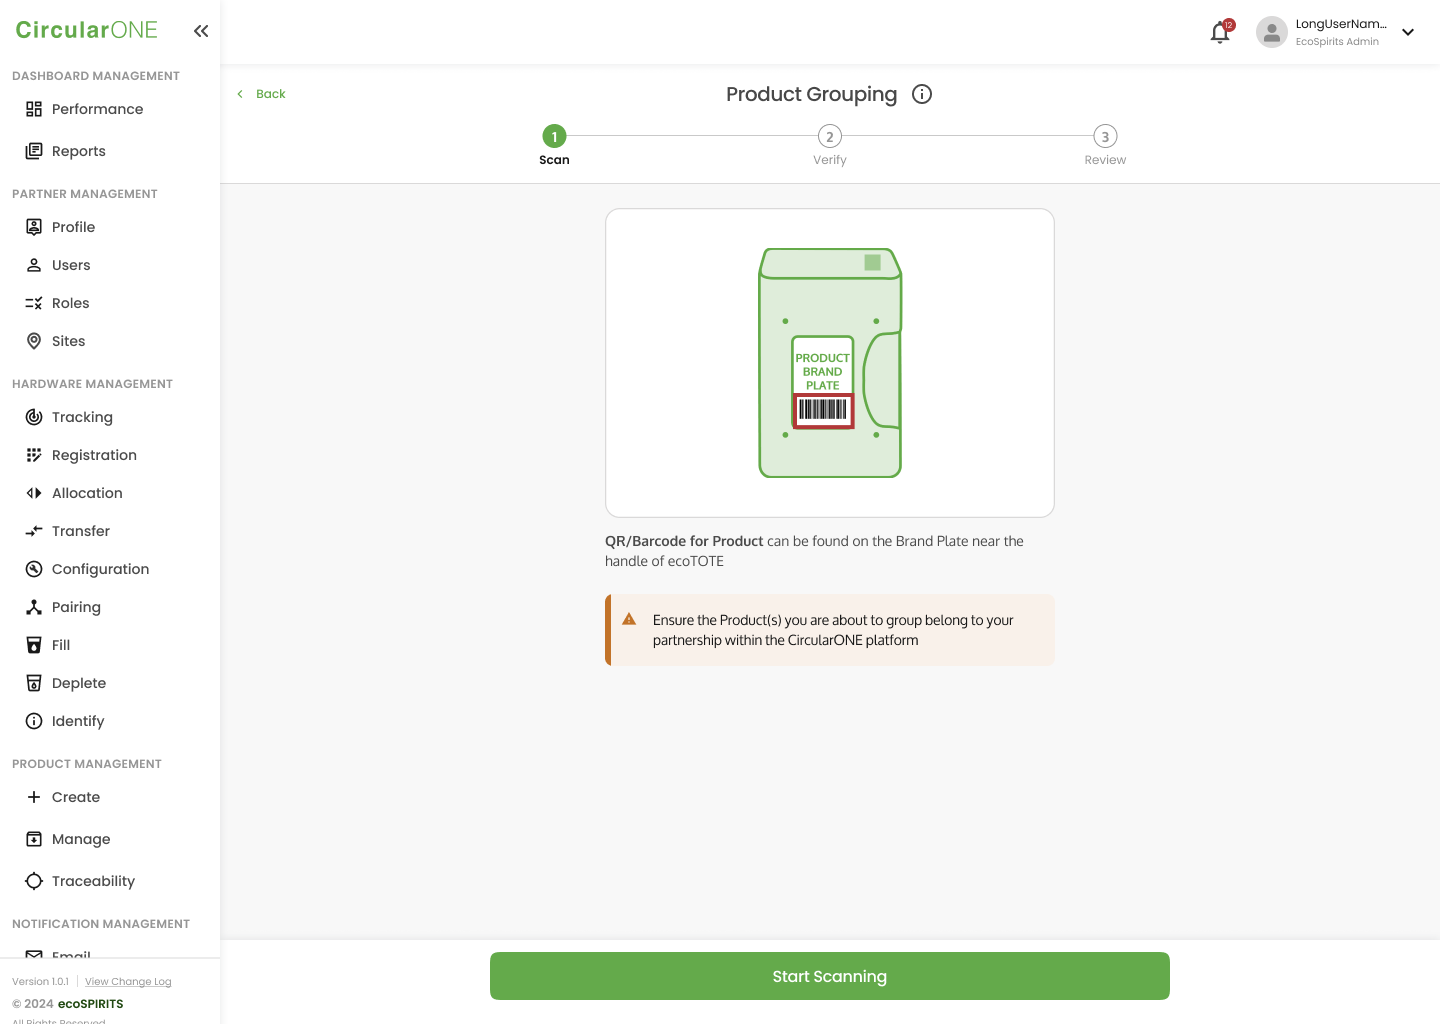
4 | View the scanning instructions and select ‘Start Scanning’ | |
| ||
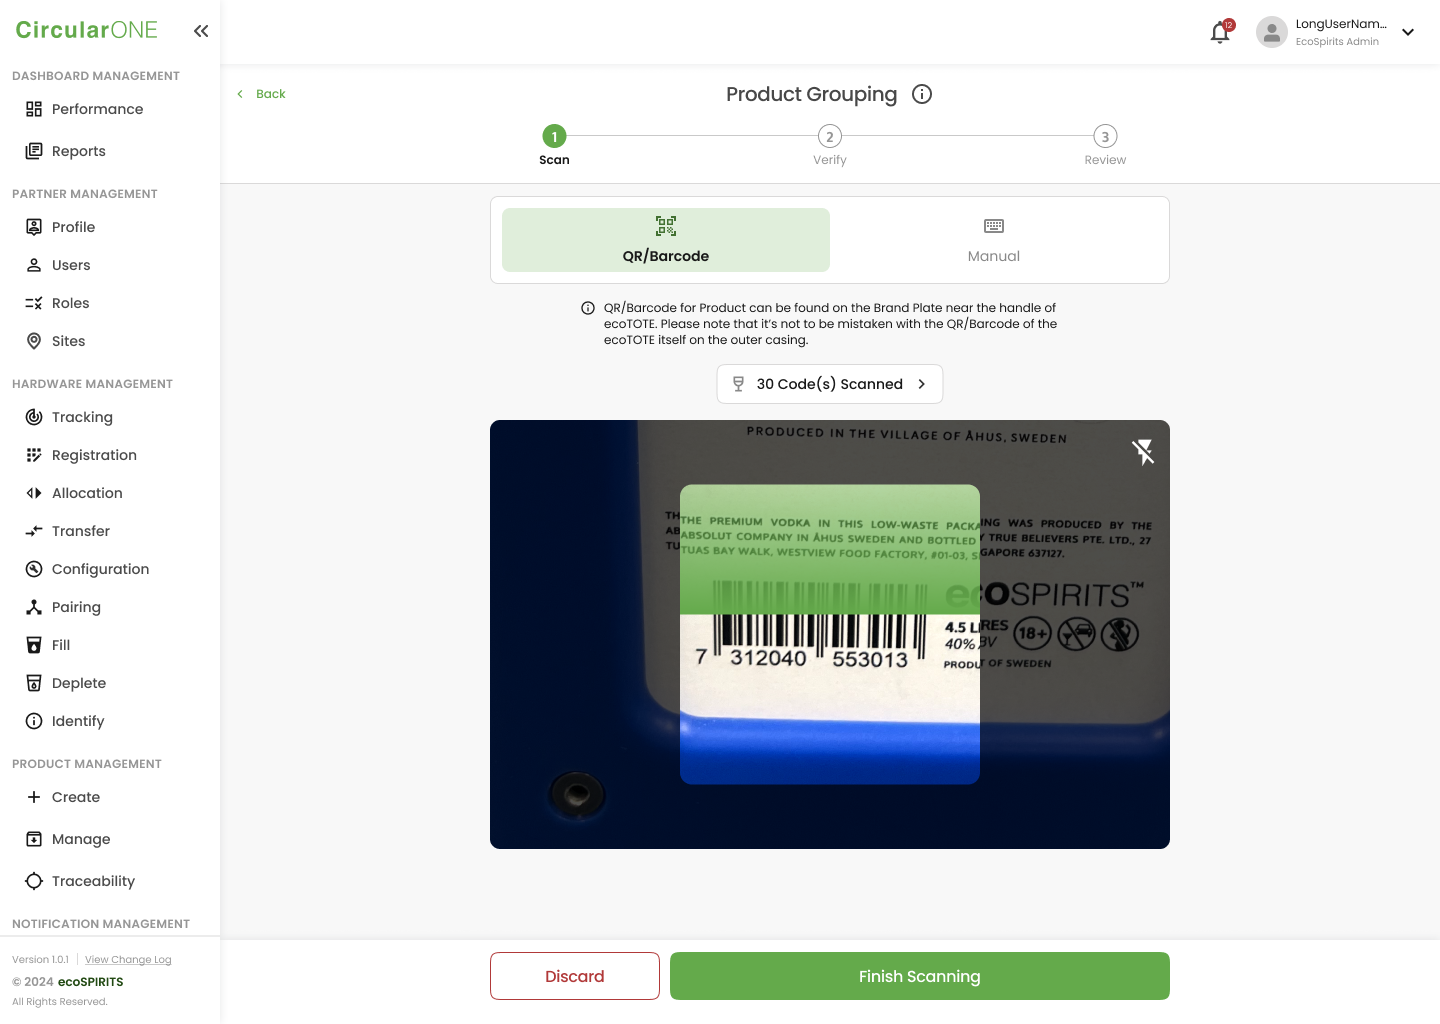
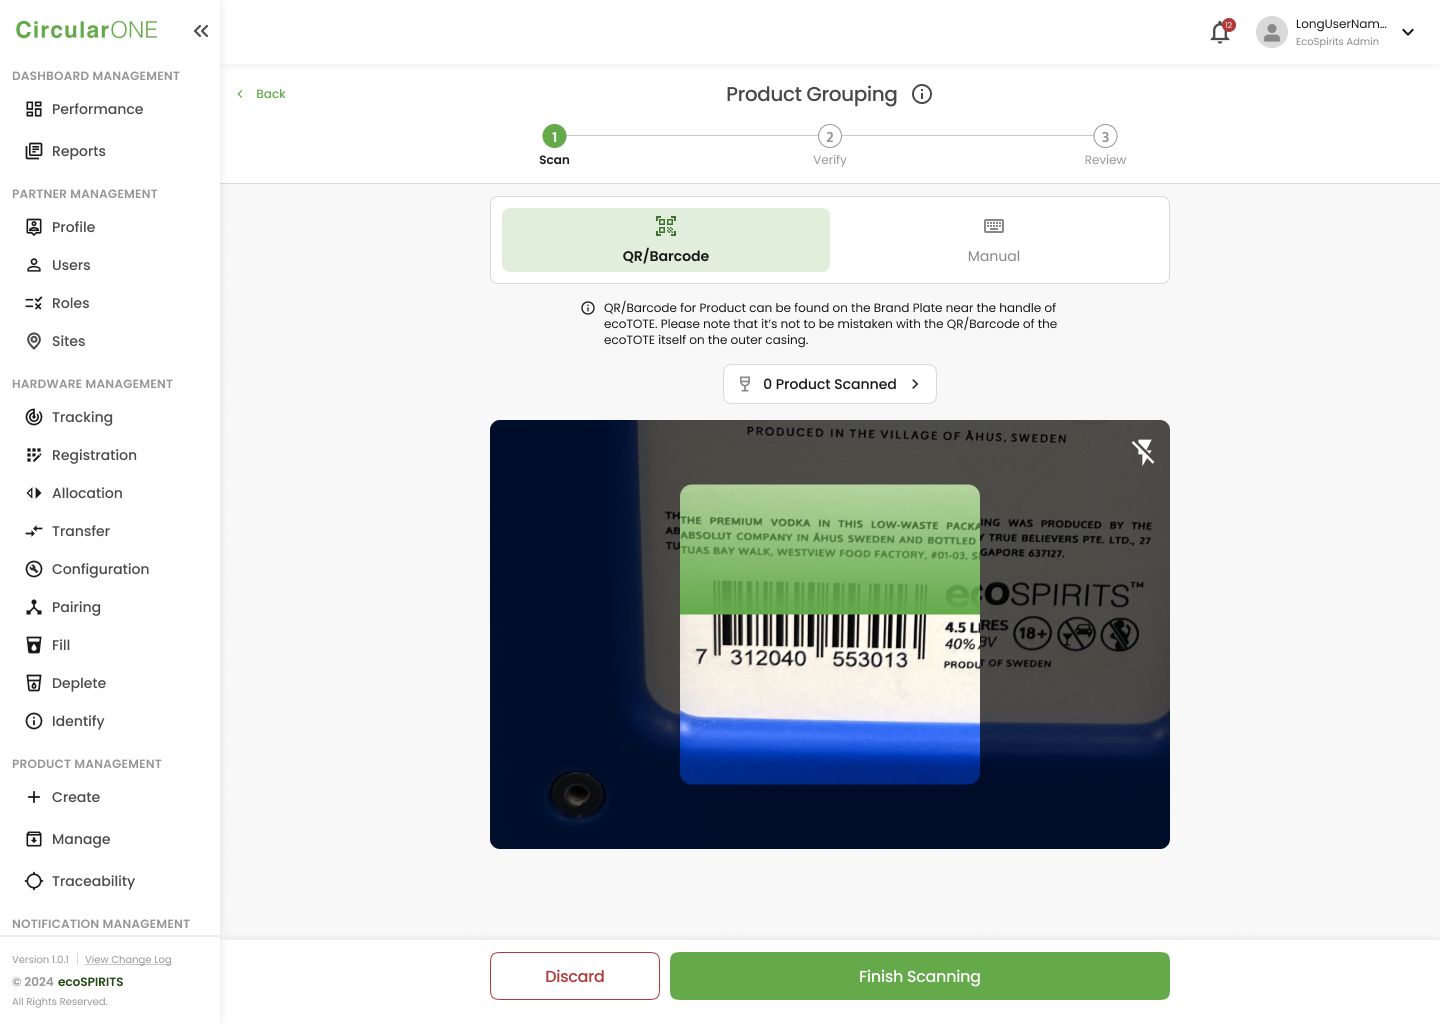
5 | Scan in your product either by QR Code or Manual Input | |
| ||
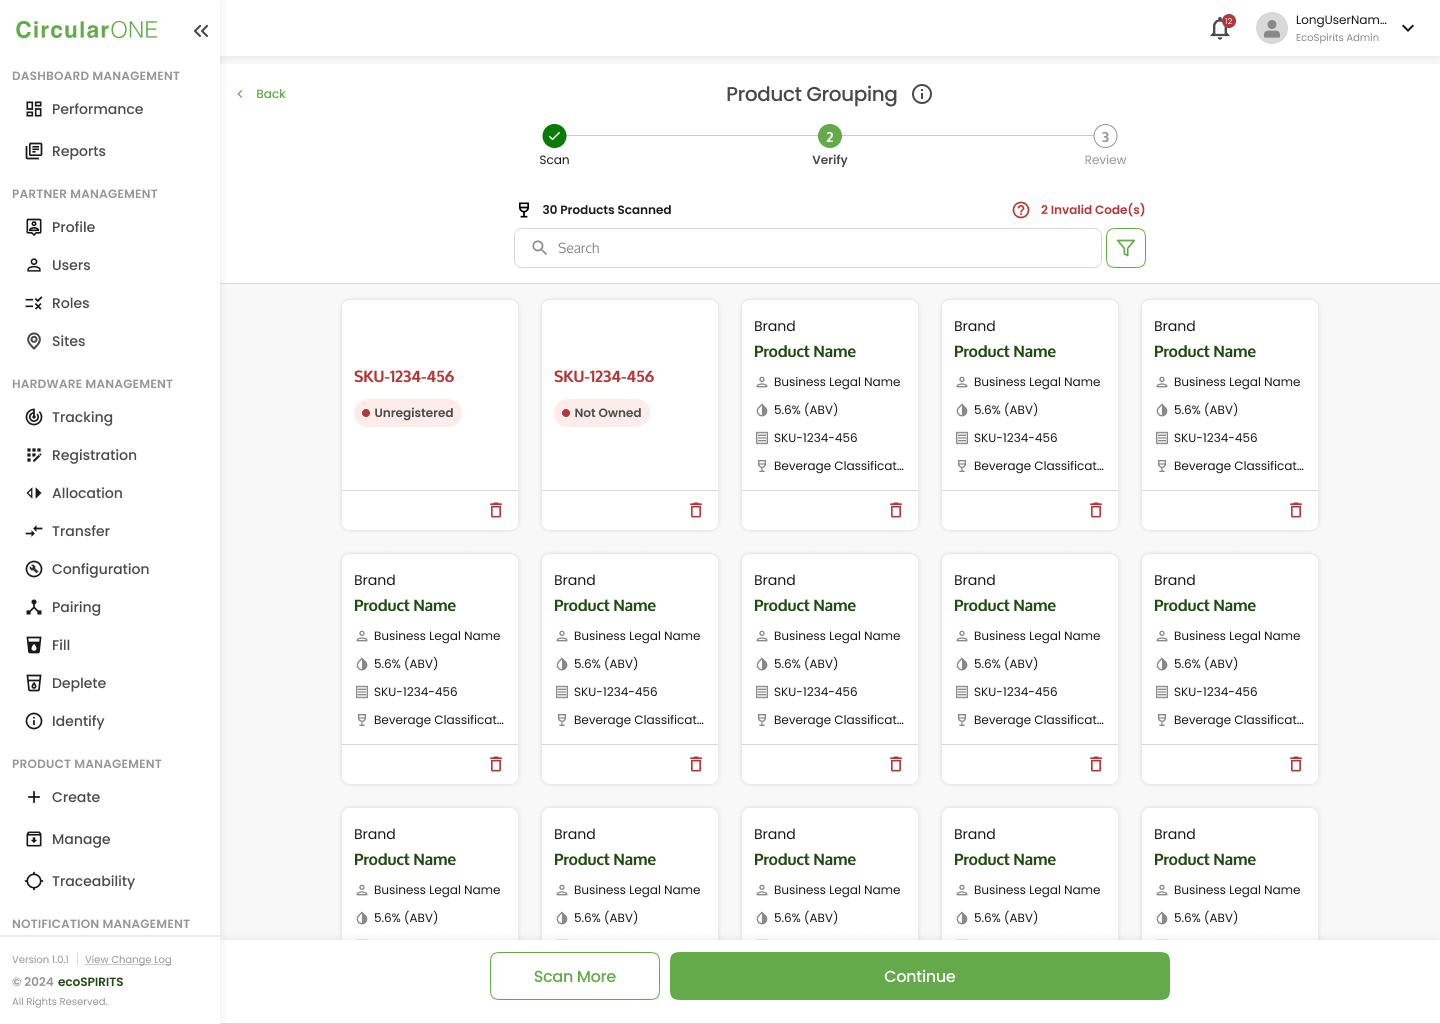
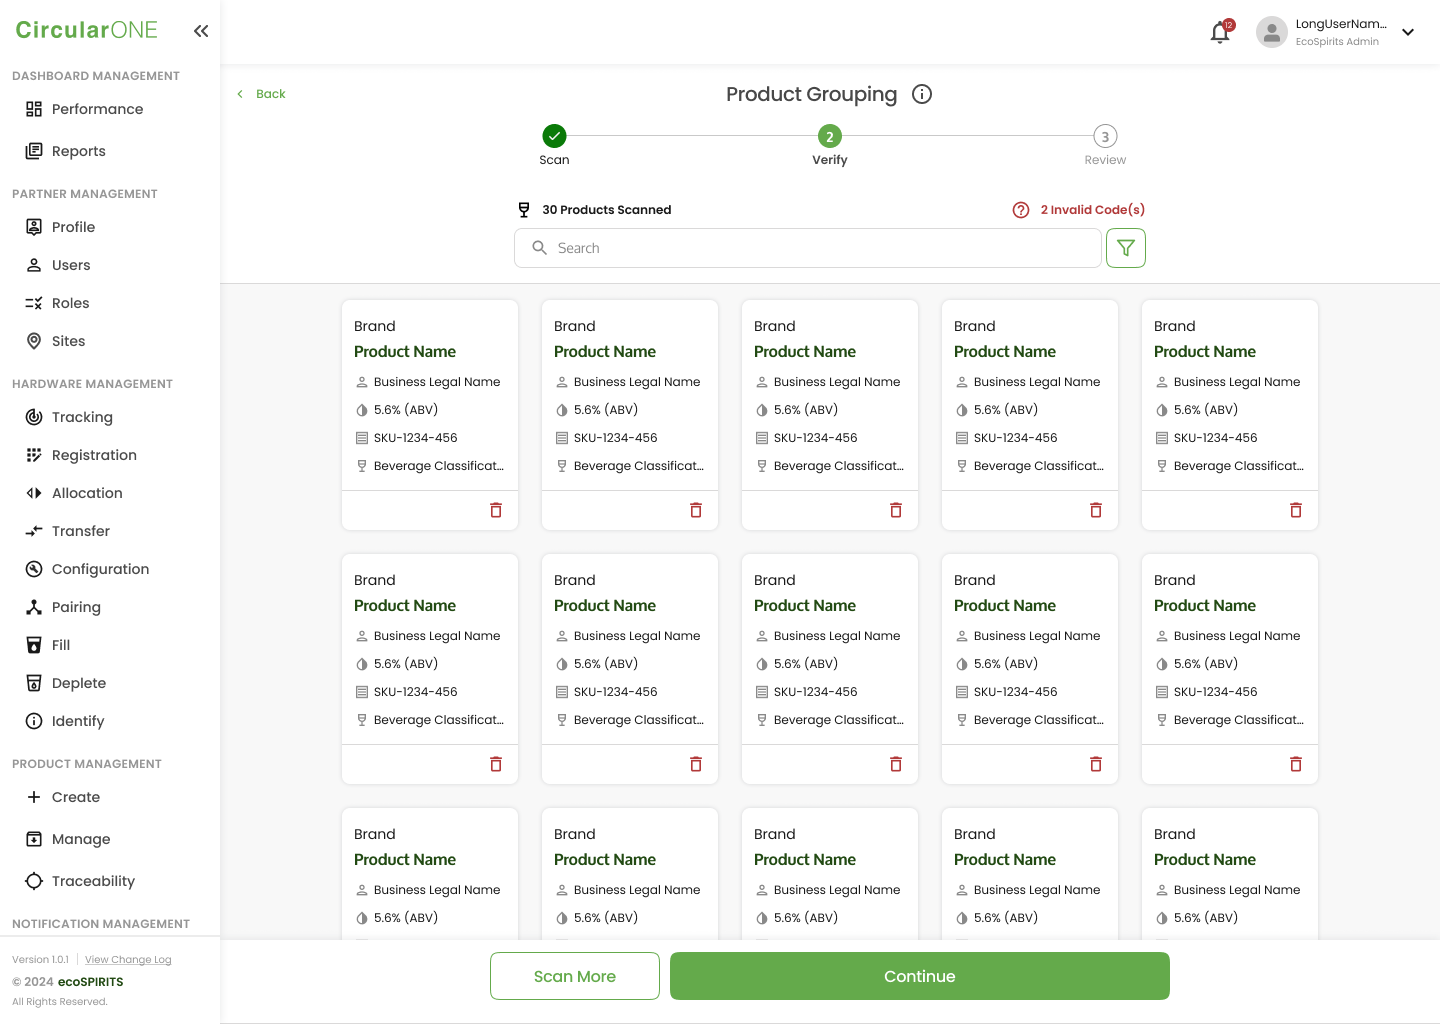
6 | Review the scanned products and ensure that any invalid product codes are removed before selecting ‘Continue’ | |
| ||
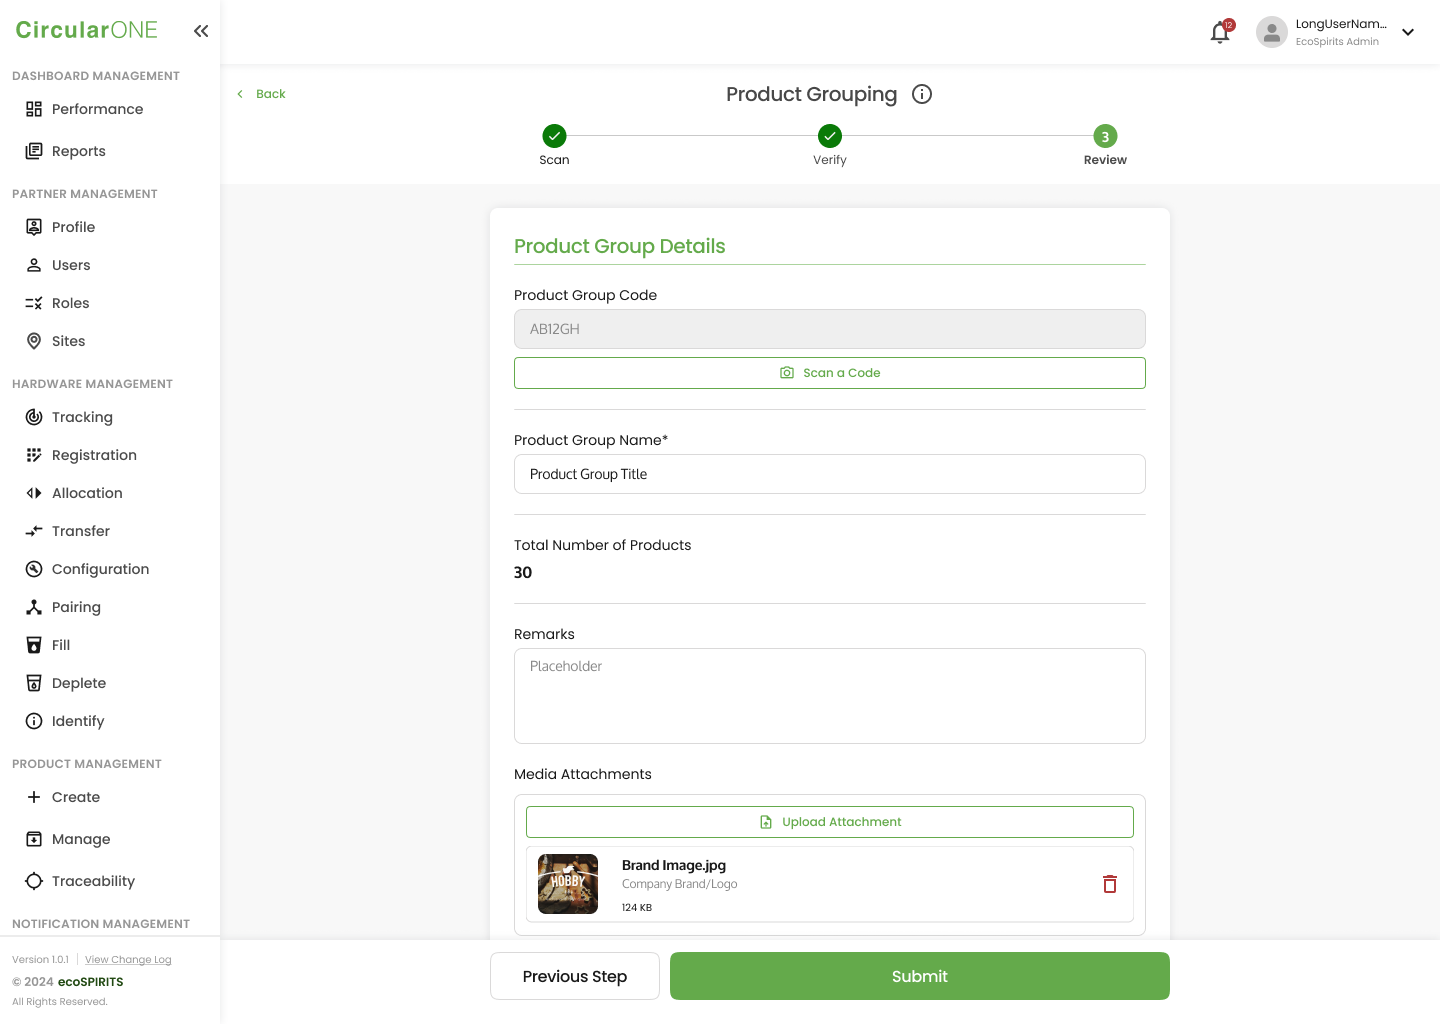
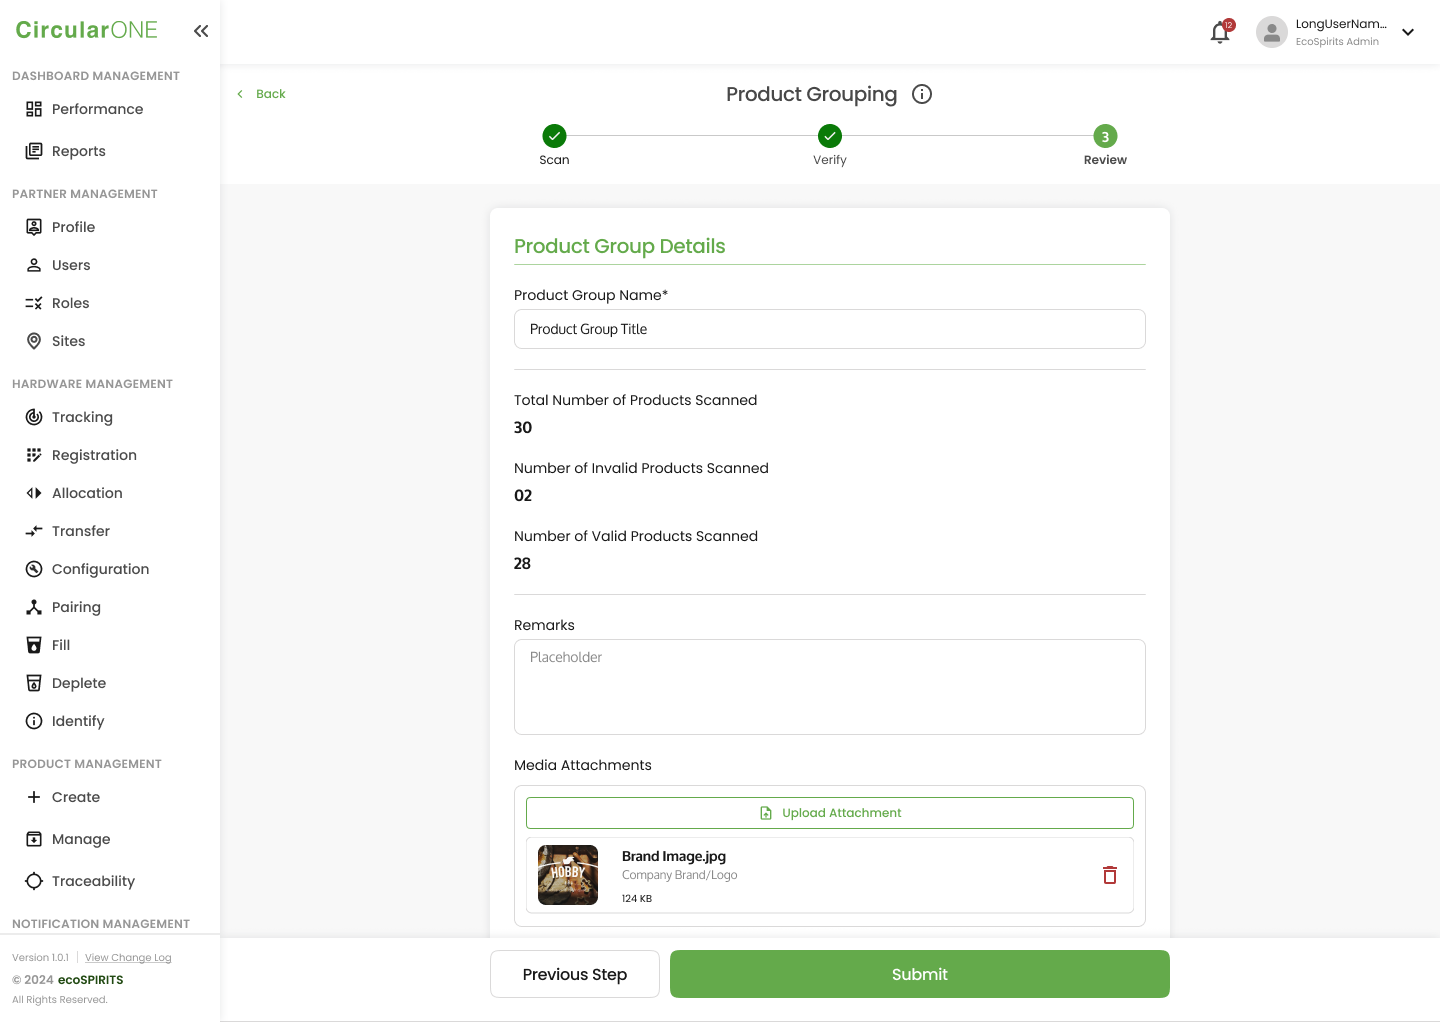
7 | Review the Product Group Report and select ‘Submit’ | |
| ||
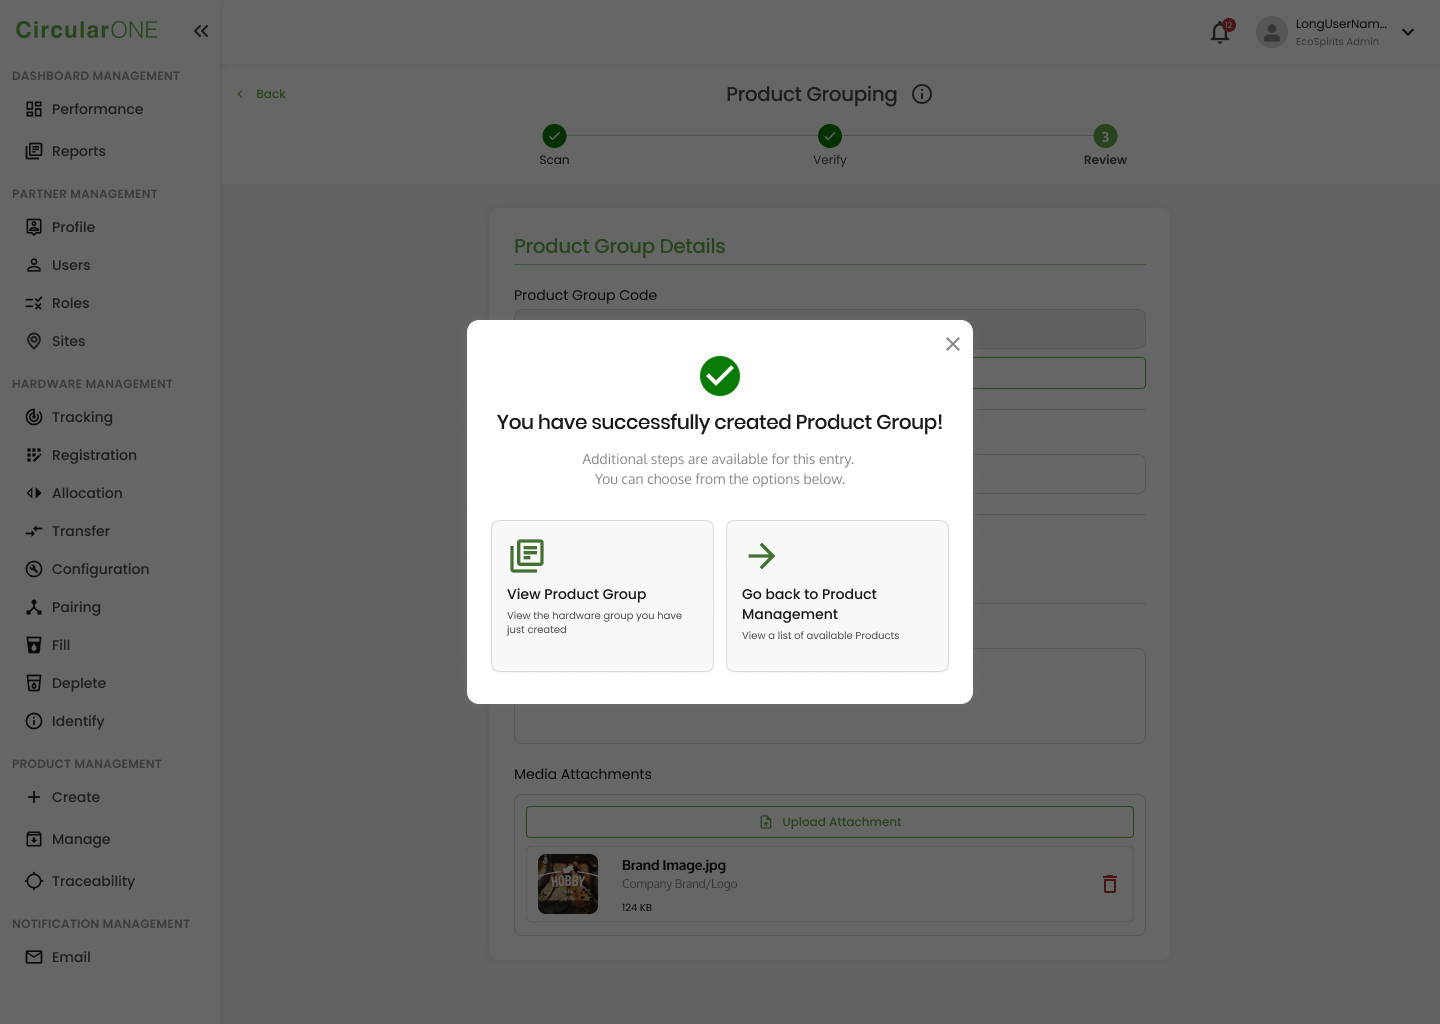
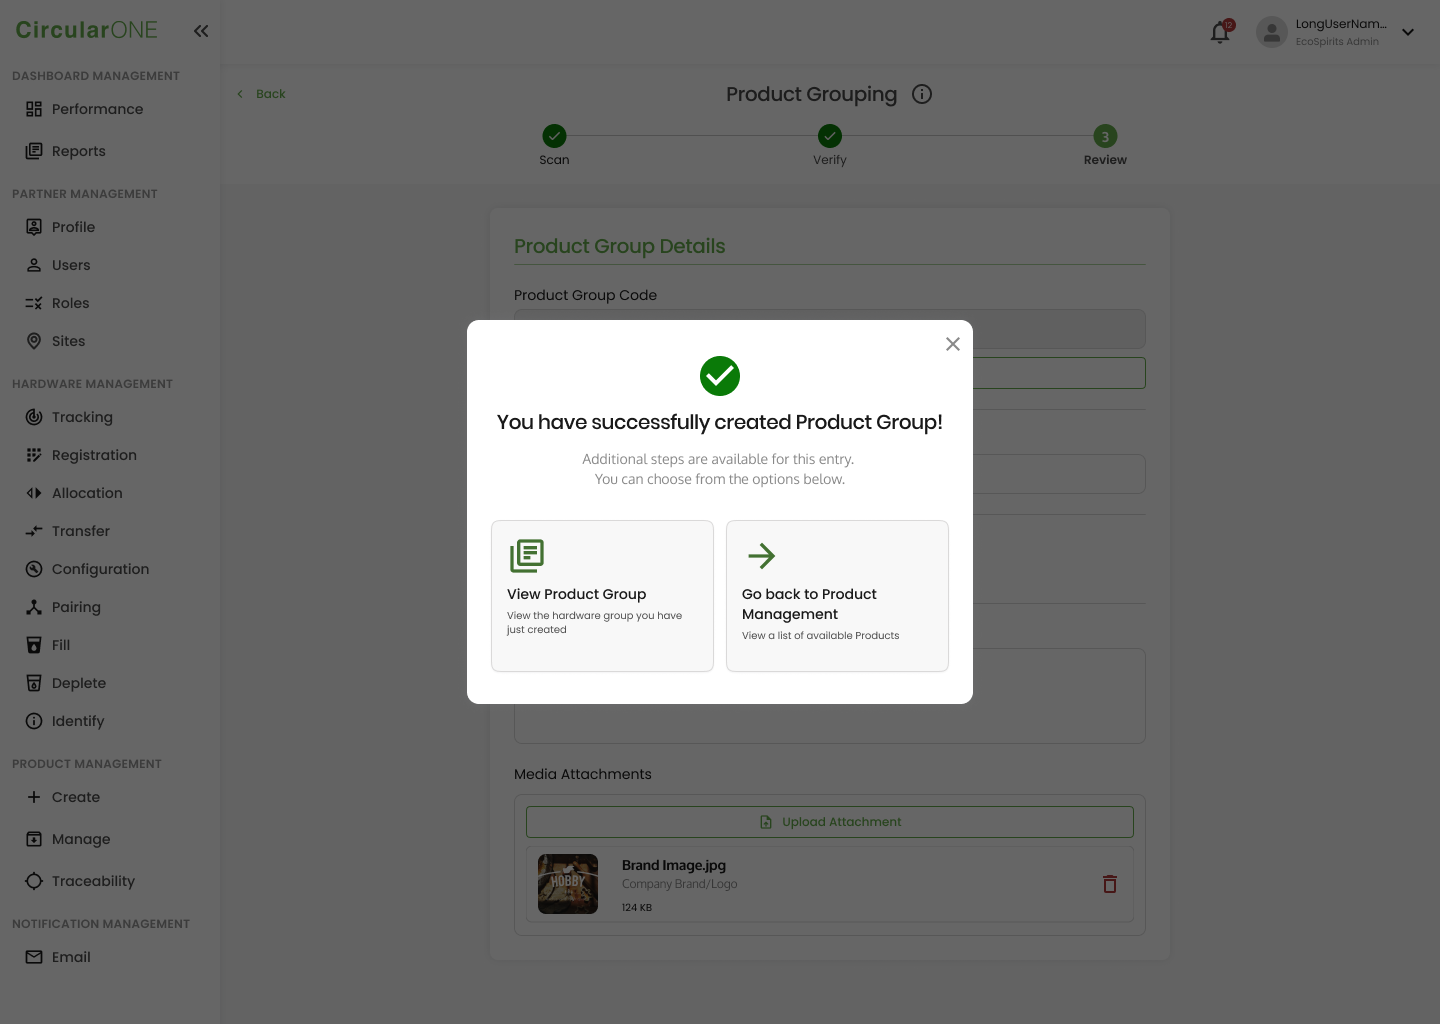
8 | If successful, you can select one of the 2 available options to continue (View Product Group or Proceed to Product Management) | |
| ||
Edit Product Group Details
To edit details of a product group, you can:
Steps | ||
|---|---|---|
1 | View an existing Product Group | |
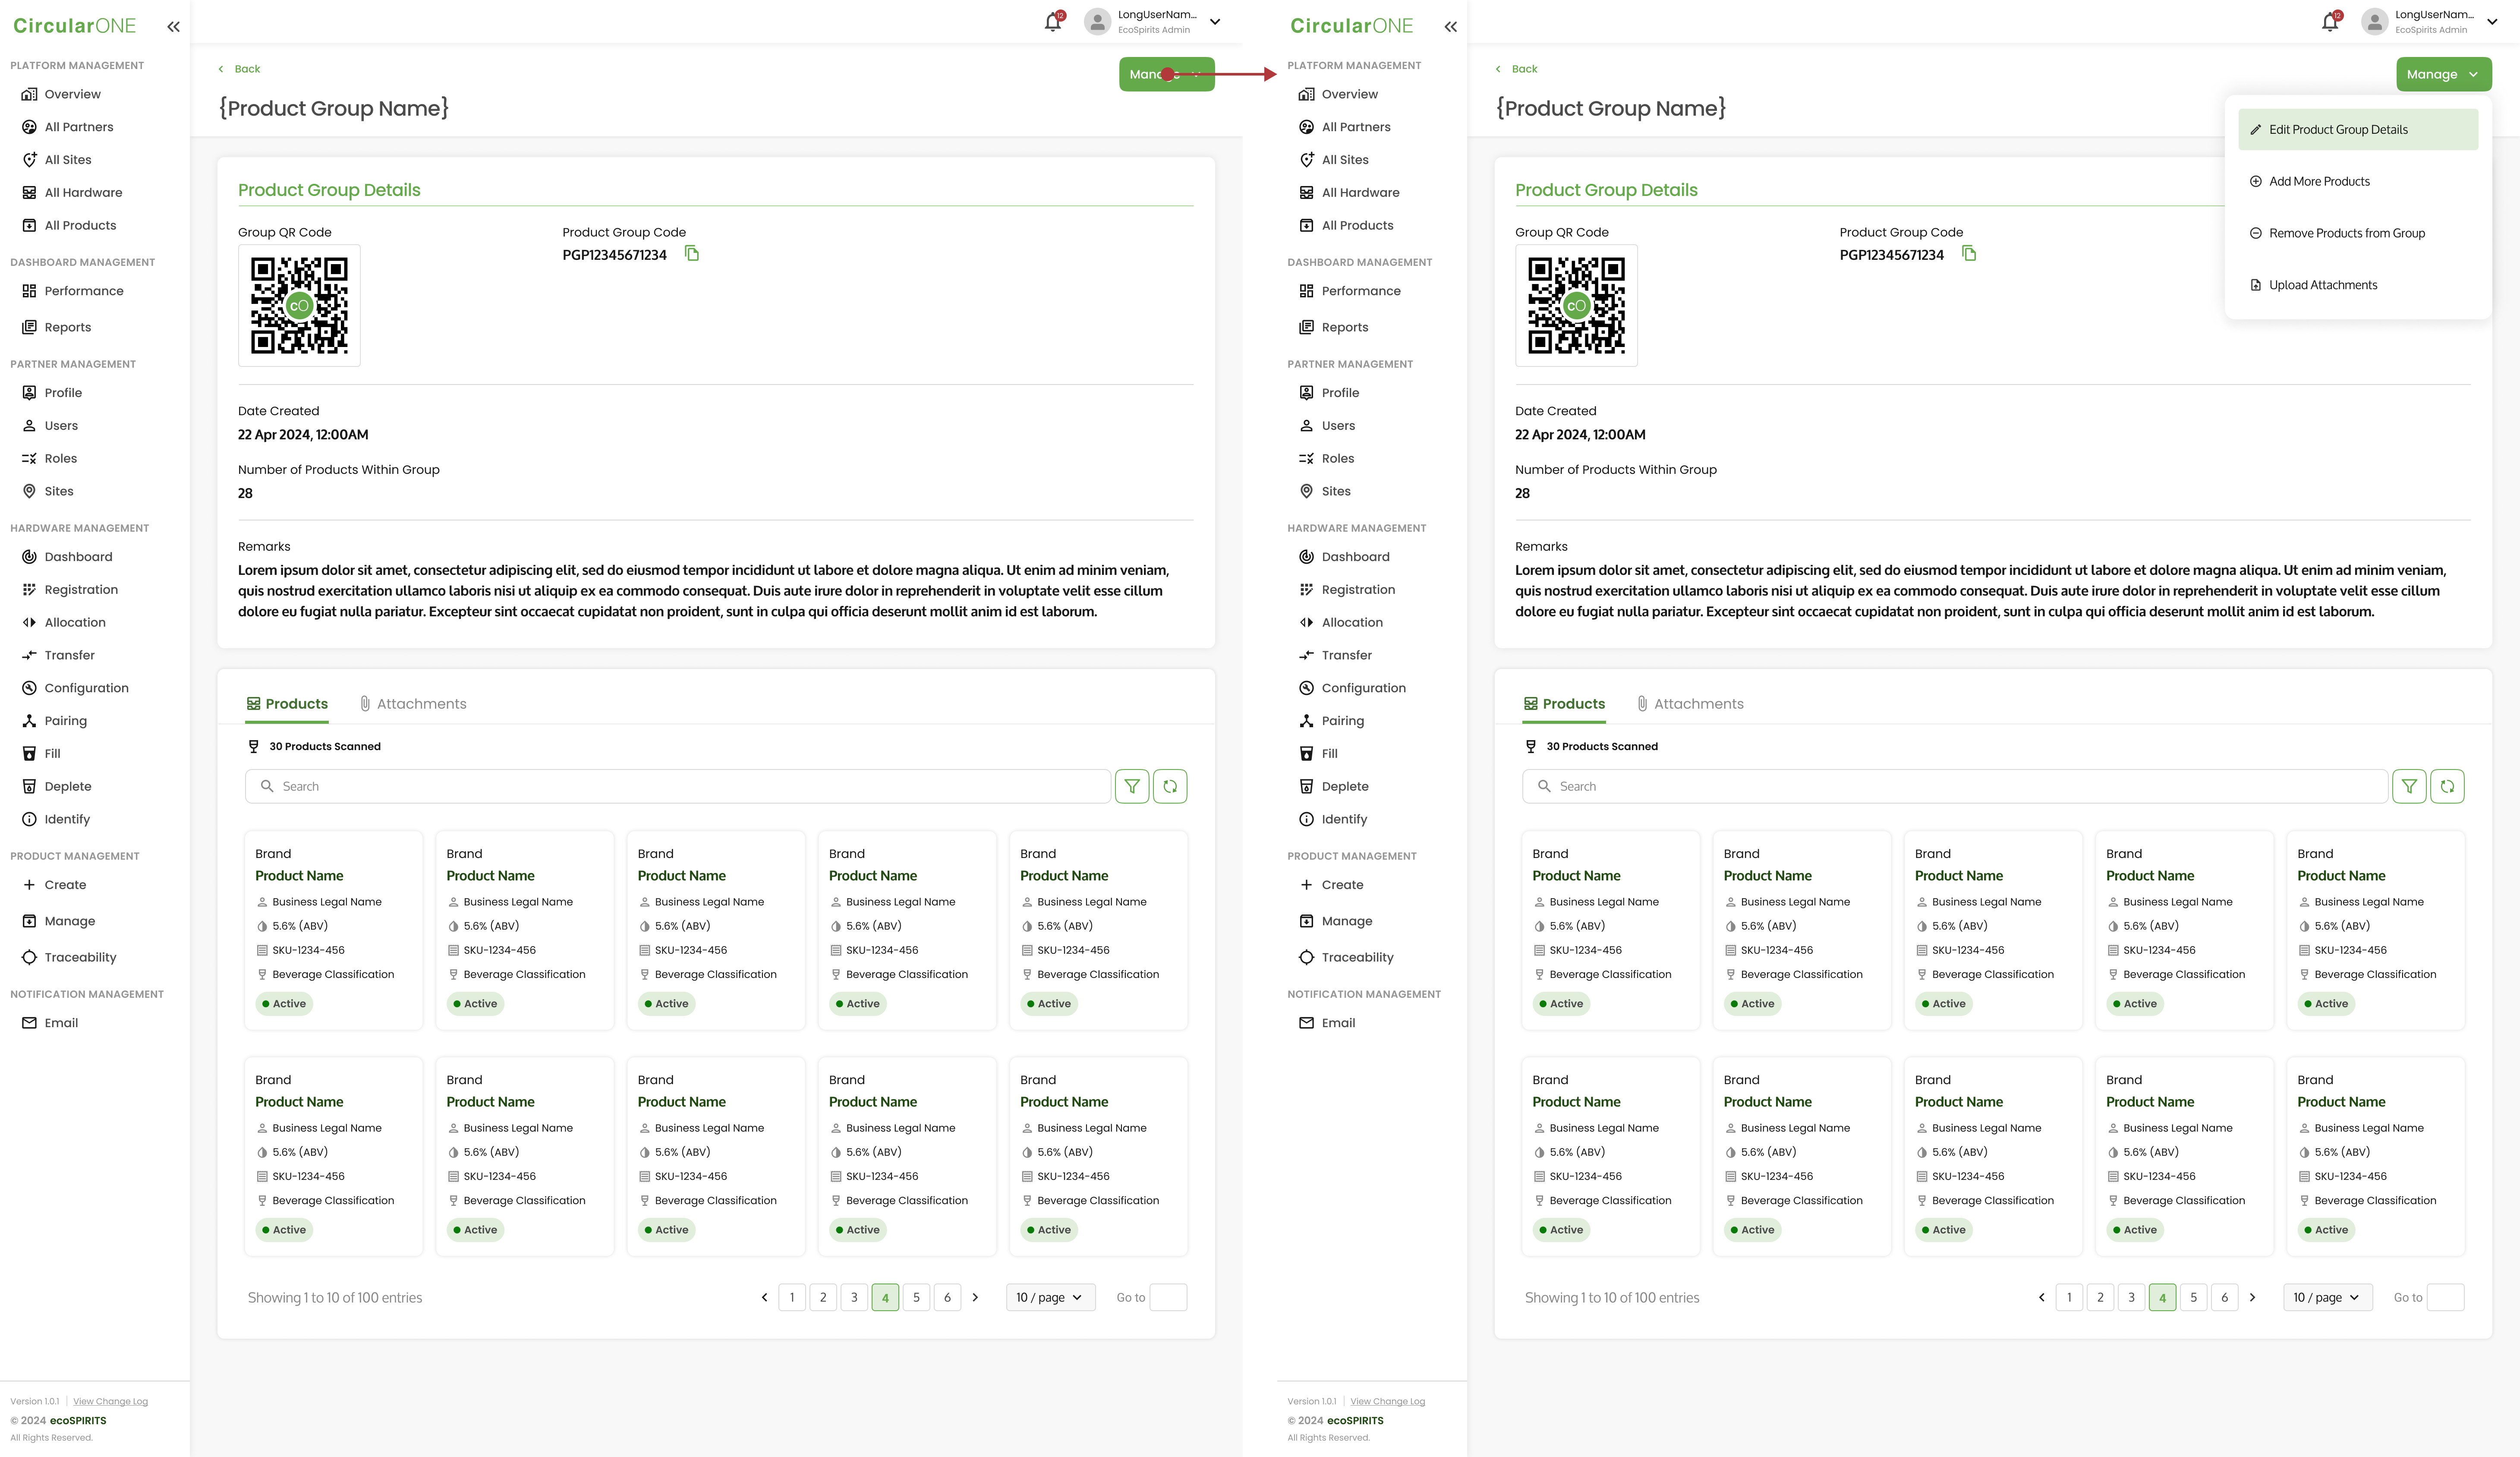
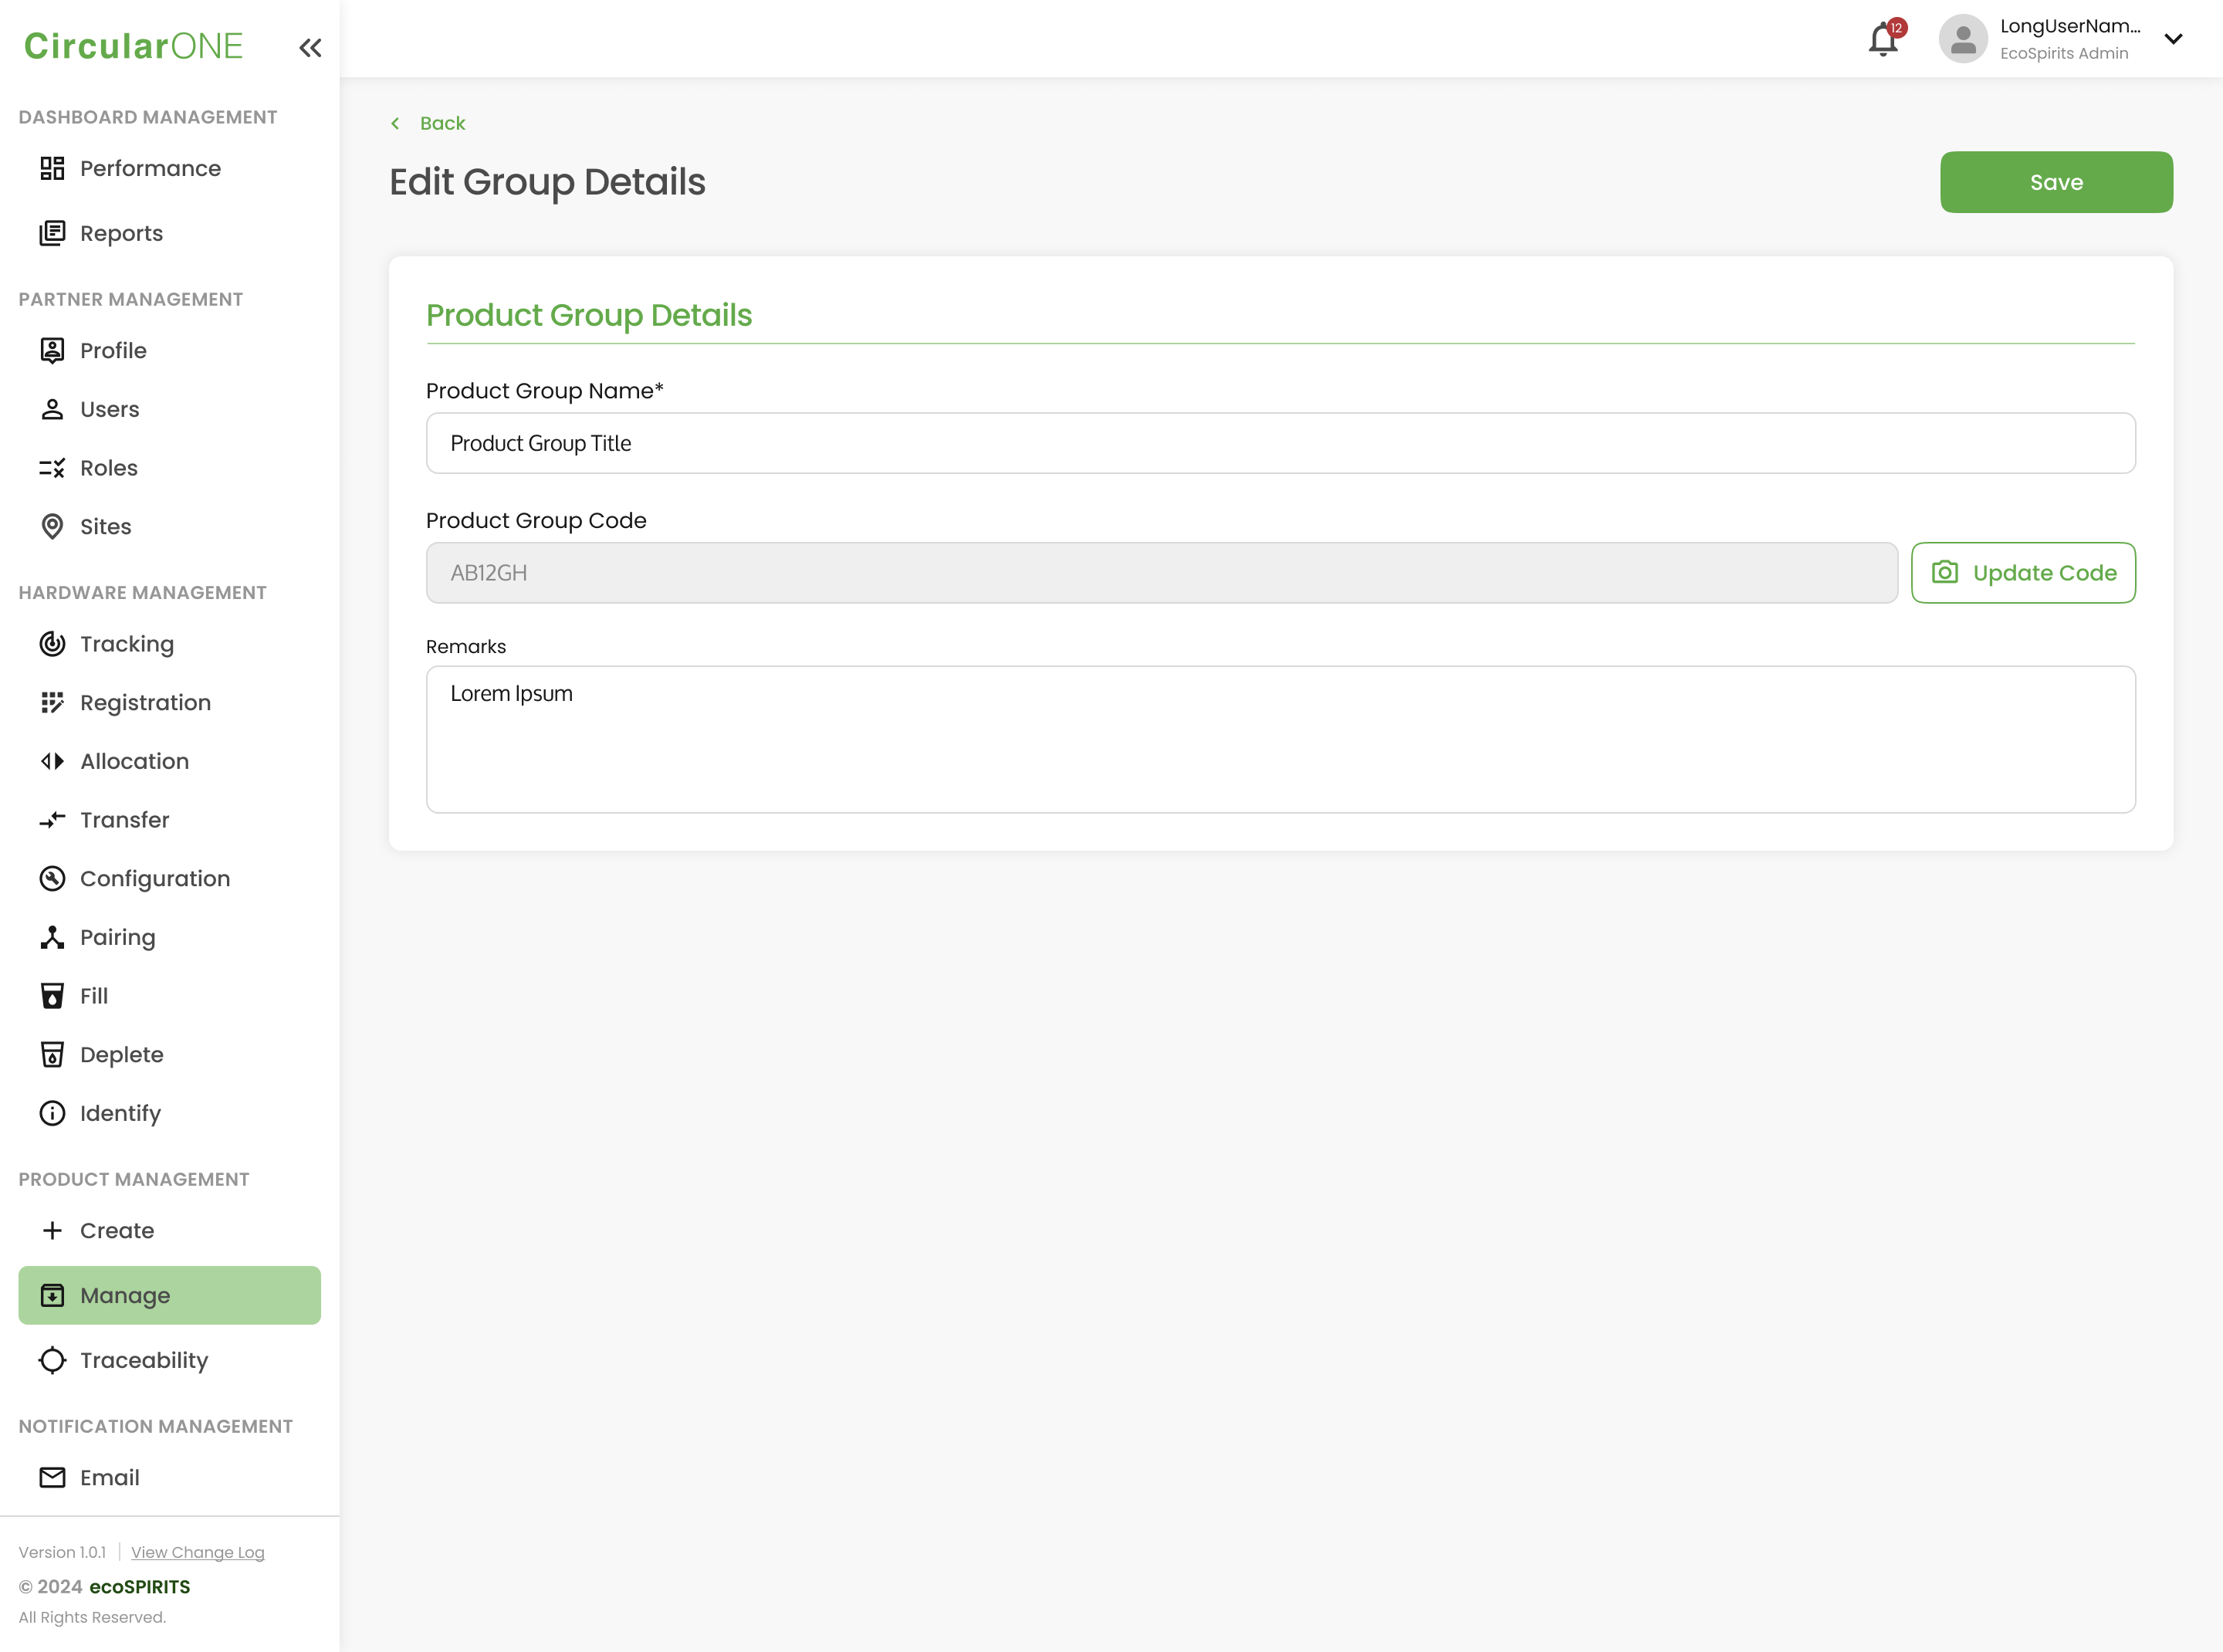
2 | Select ‘Manage’ and click on ‘Edit Product Group Details’ | |
| ||
3 | Edit the Product Group Name by typing a new group name | |
| ||
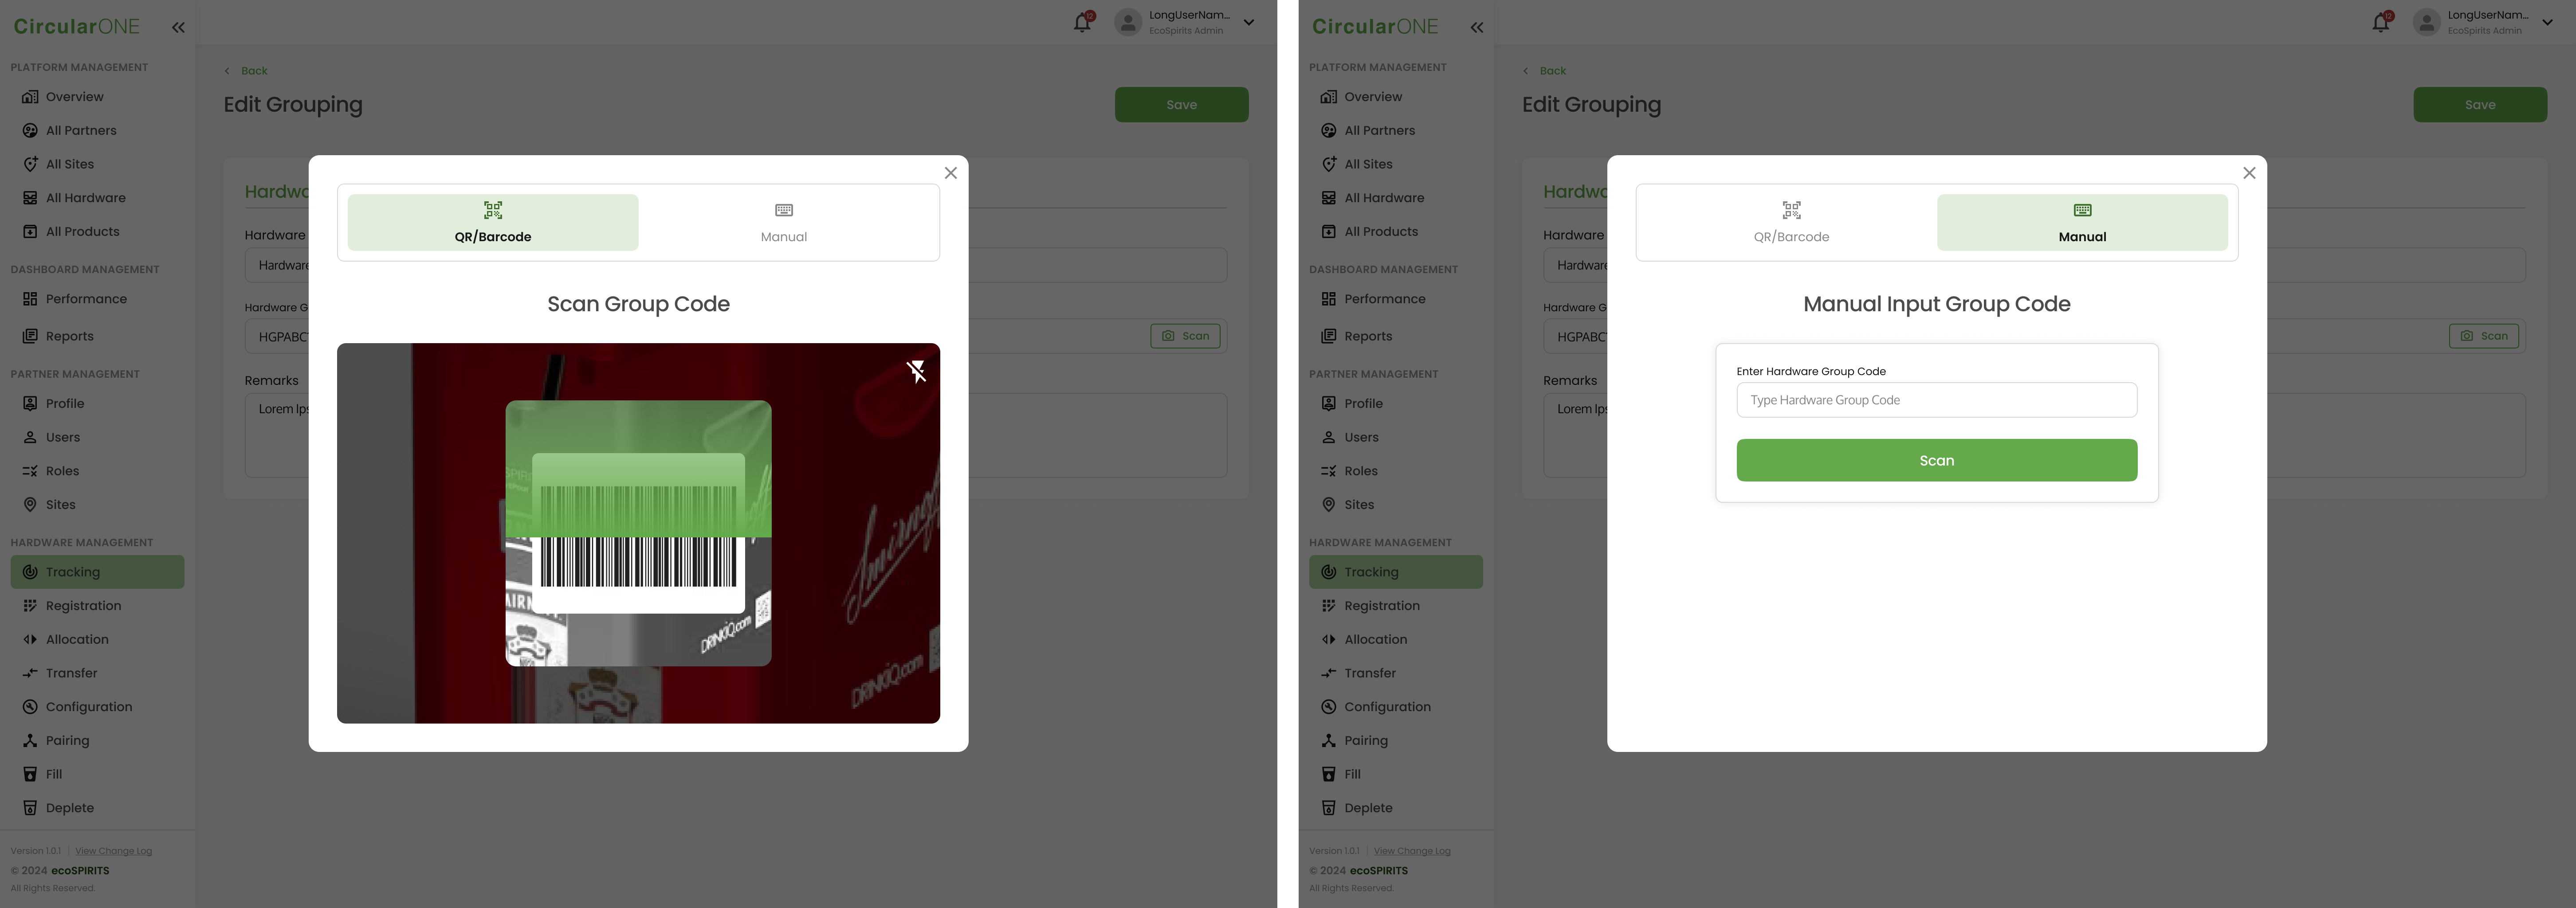
4 | Edit the Product Group Code, by clicking on ‘Update Code’ and thereafter scan a new Product Group Code or manually type in a new group code. If successful, the group code will be updated automatically. | |
| ||
5 | Click ‘Save’ once you have made the necessary changes | |
6 | If successful, you will be redirected back to Product Group Profile | |
Add Product to an existing Product Group
To add a product to an existing Product Group, you can:
Steps | ||
|---|---|---|
1 | Select an existing Product Group | |
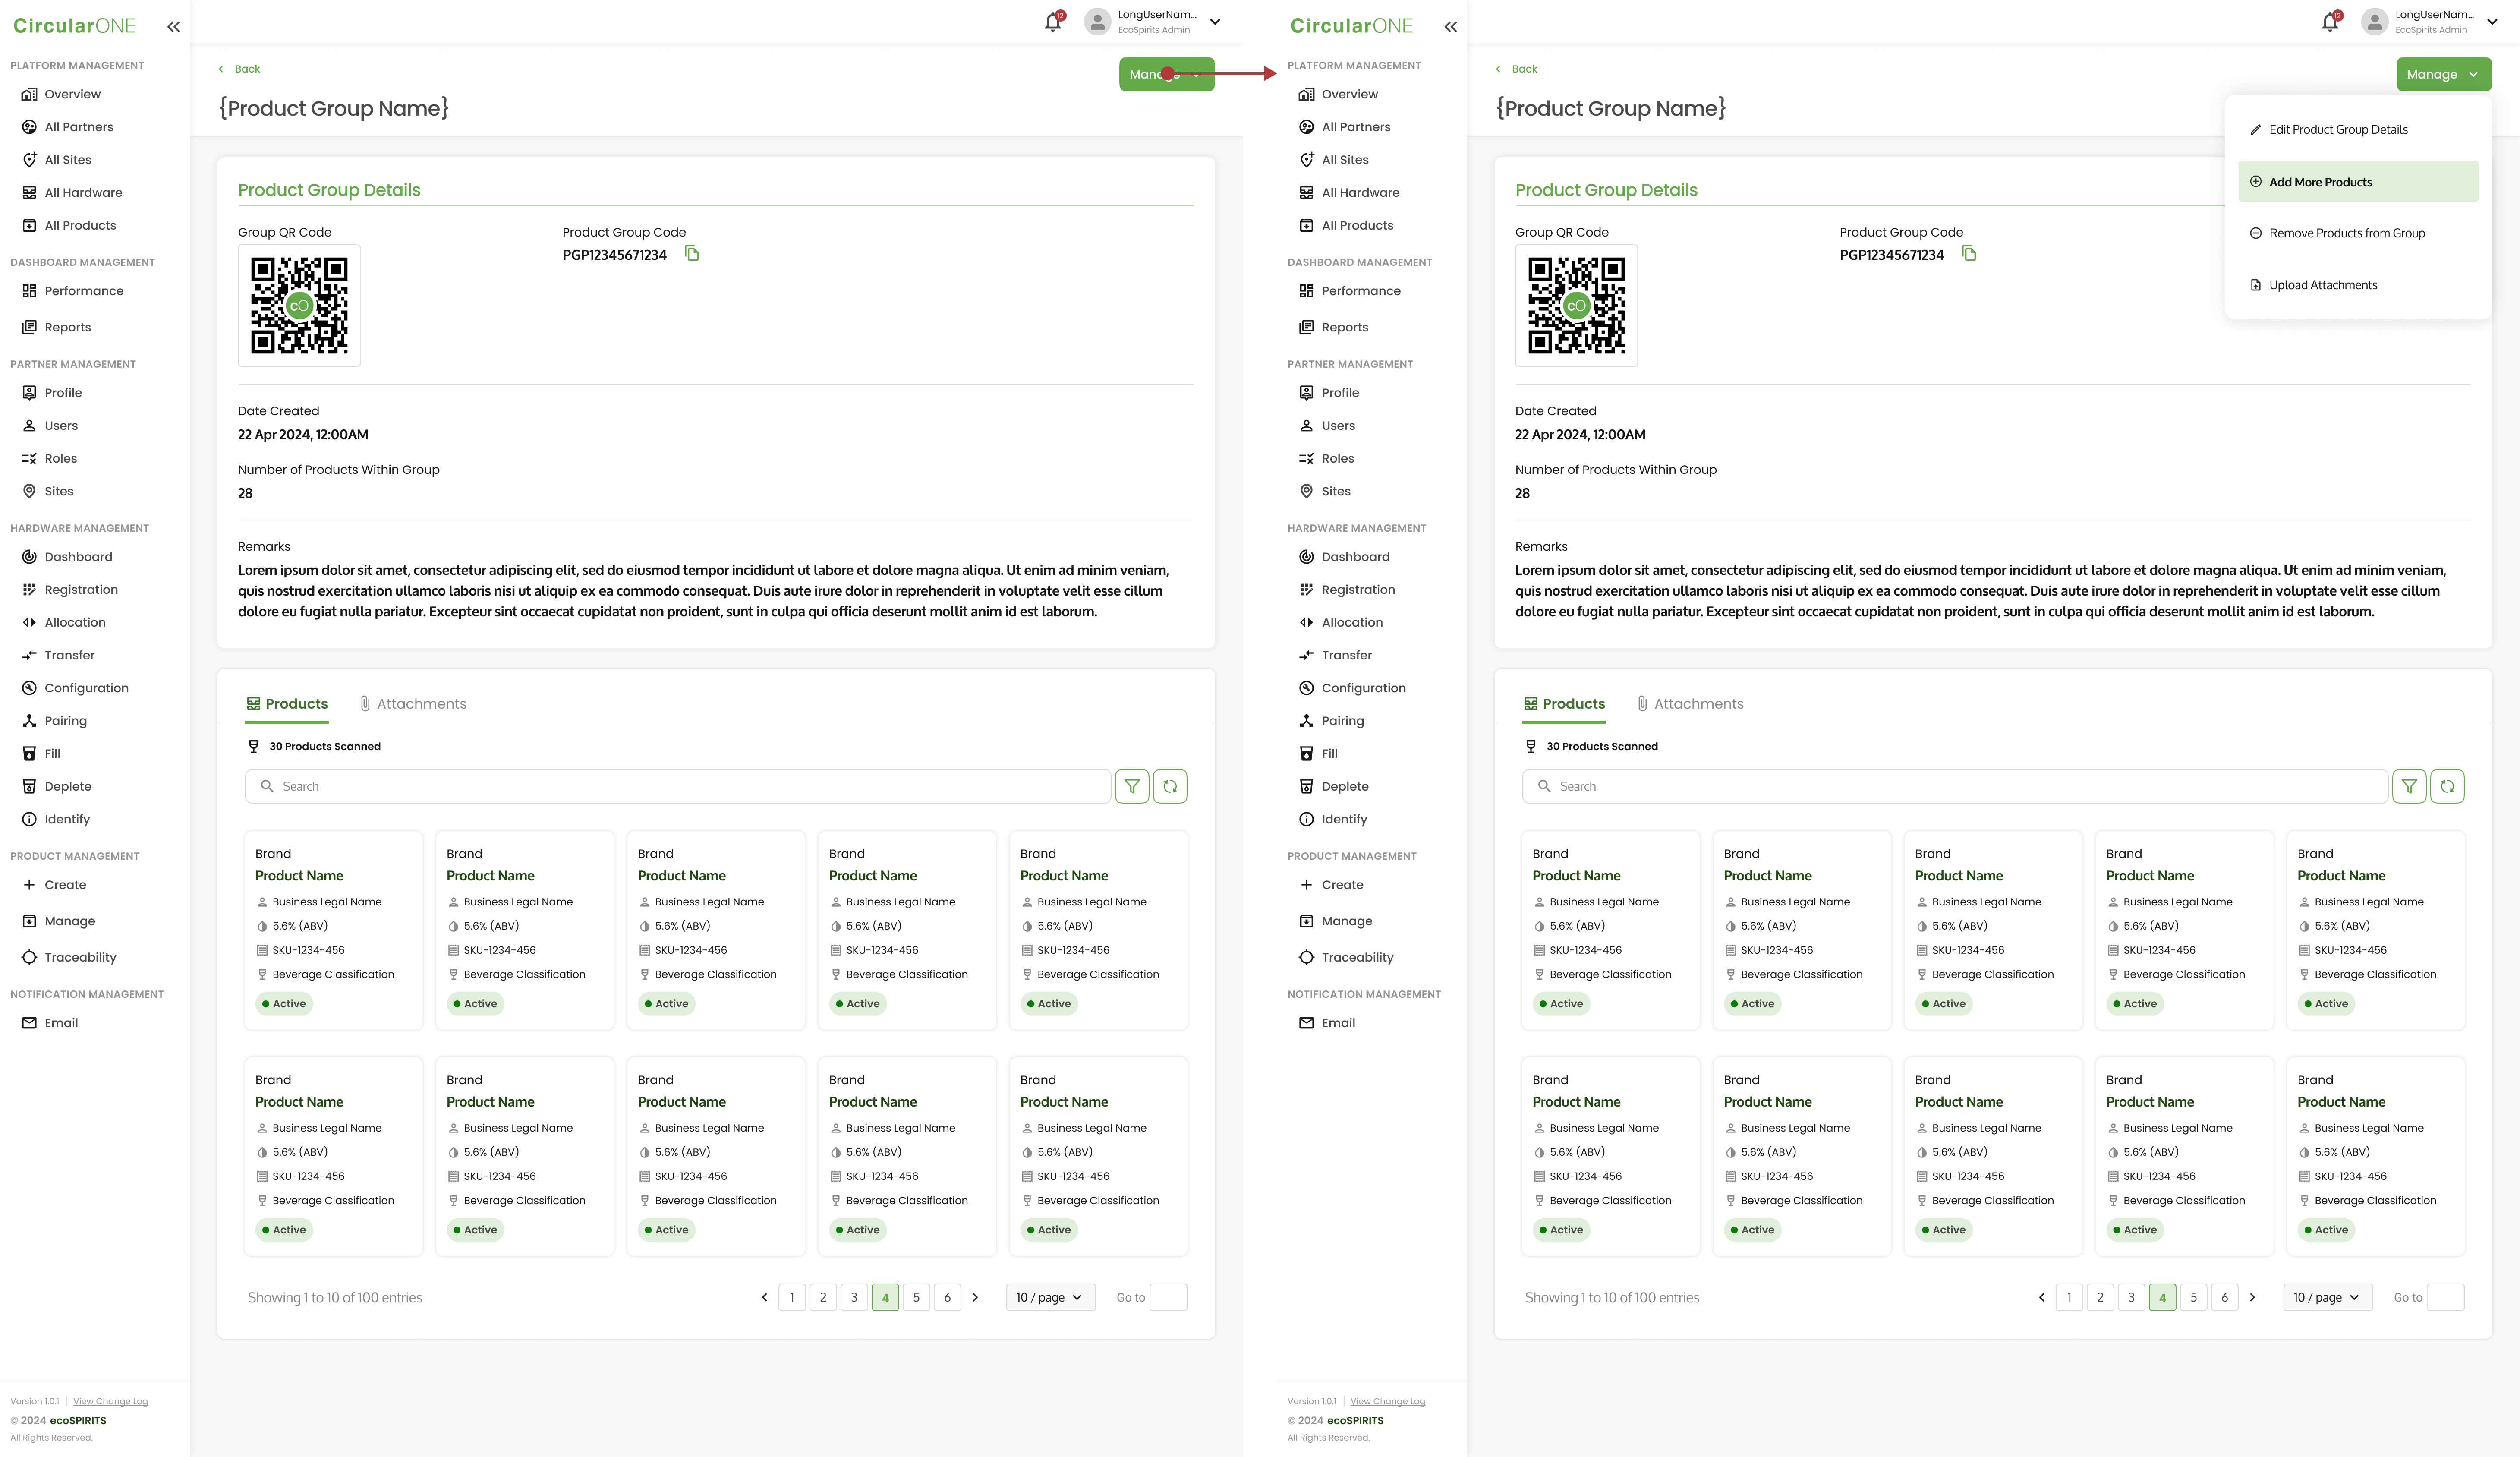
2 | Select ‘Manage’ and click on ‘Add More Products’ | |
| ||
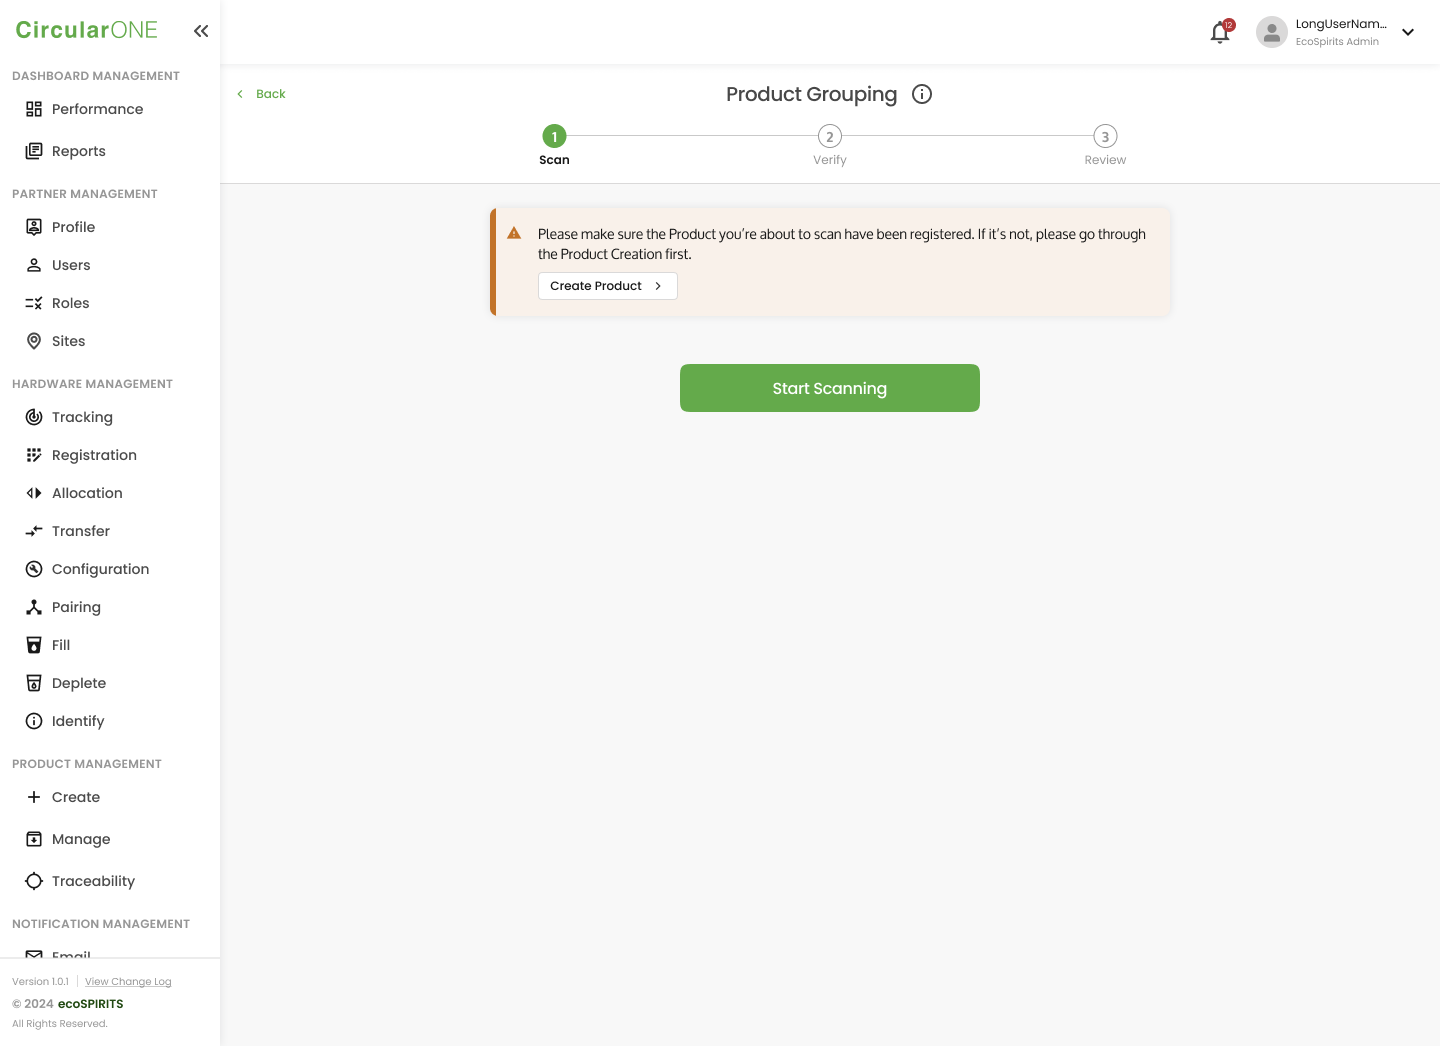
3 | Read the instructions prior to scanning the hardware | |
| ||
4 | Scan the hardware that you would like to add to the hardware group and select ‘Finish Scanning’ | |
| ||
5 | Review the scanned product and ensure that all invalid products have been removed. Thereafter, select ‘Continue’ to proceed. | |
| ||
6 | Review the Hardware Group Report and select ‘Finish’ | |
| ||
7 | If successful, you can select one of the 2 available options to continue (View Product Group or Proceed to Product Management) | |
| ||
Remove Product from an existing Product Group
To remove a product from an existing product group, you can:
Steps | ||
|---|---|---|
1 | Select an existing Product Group | |
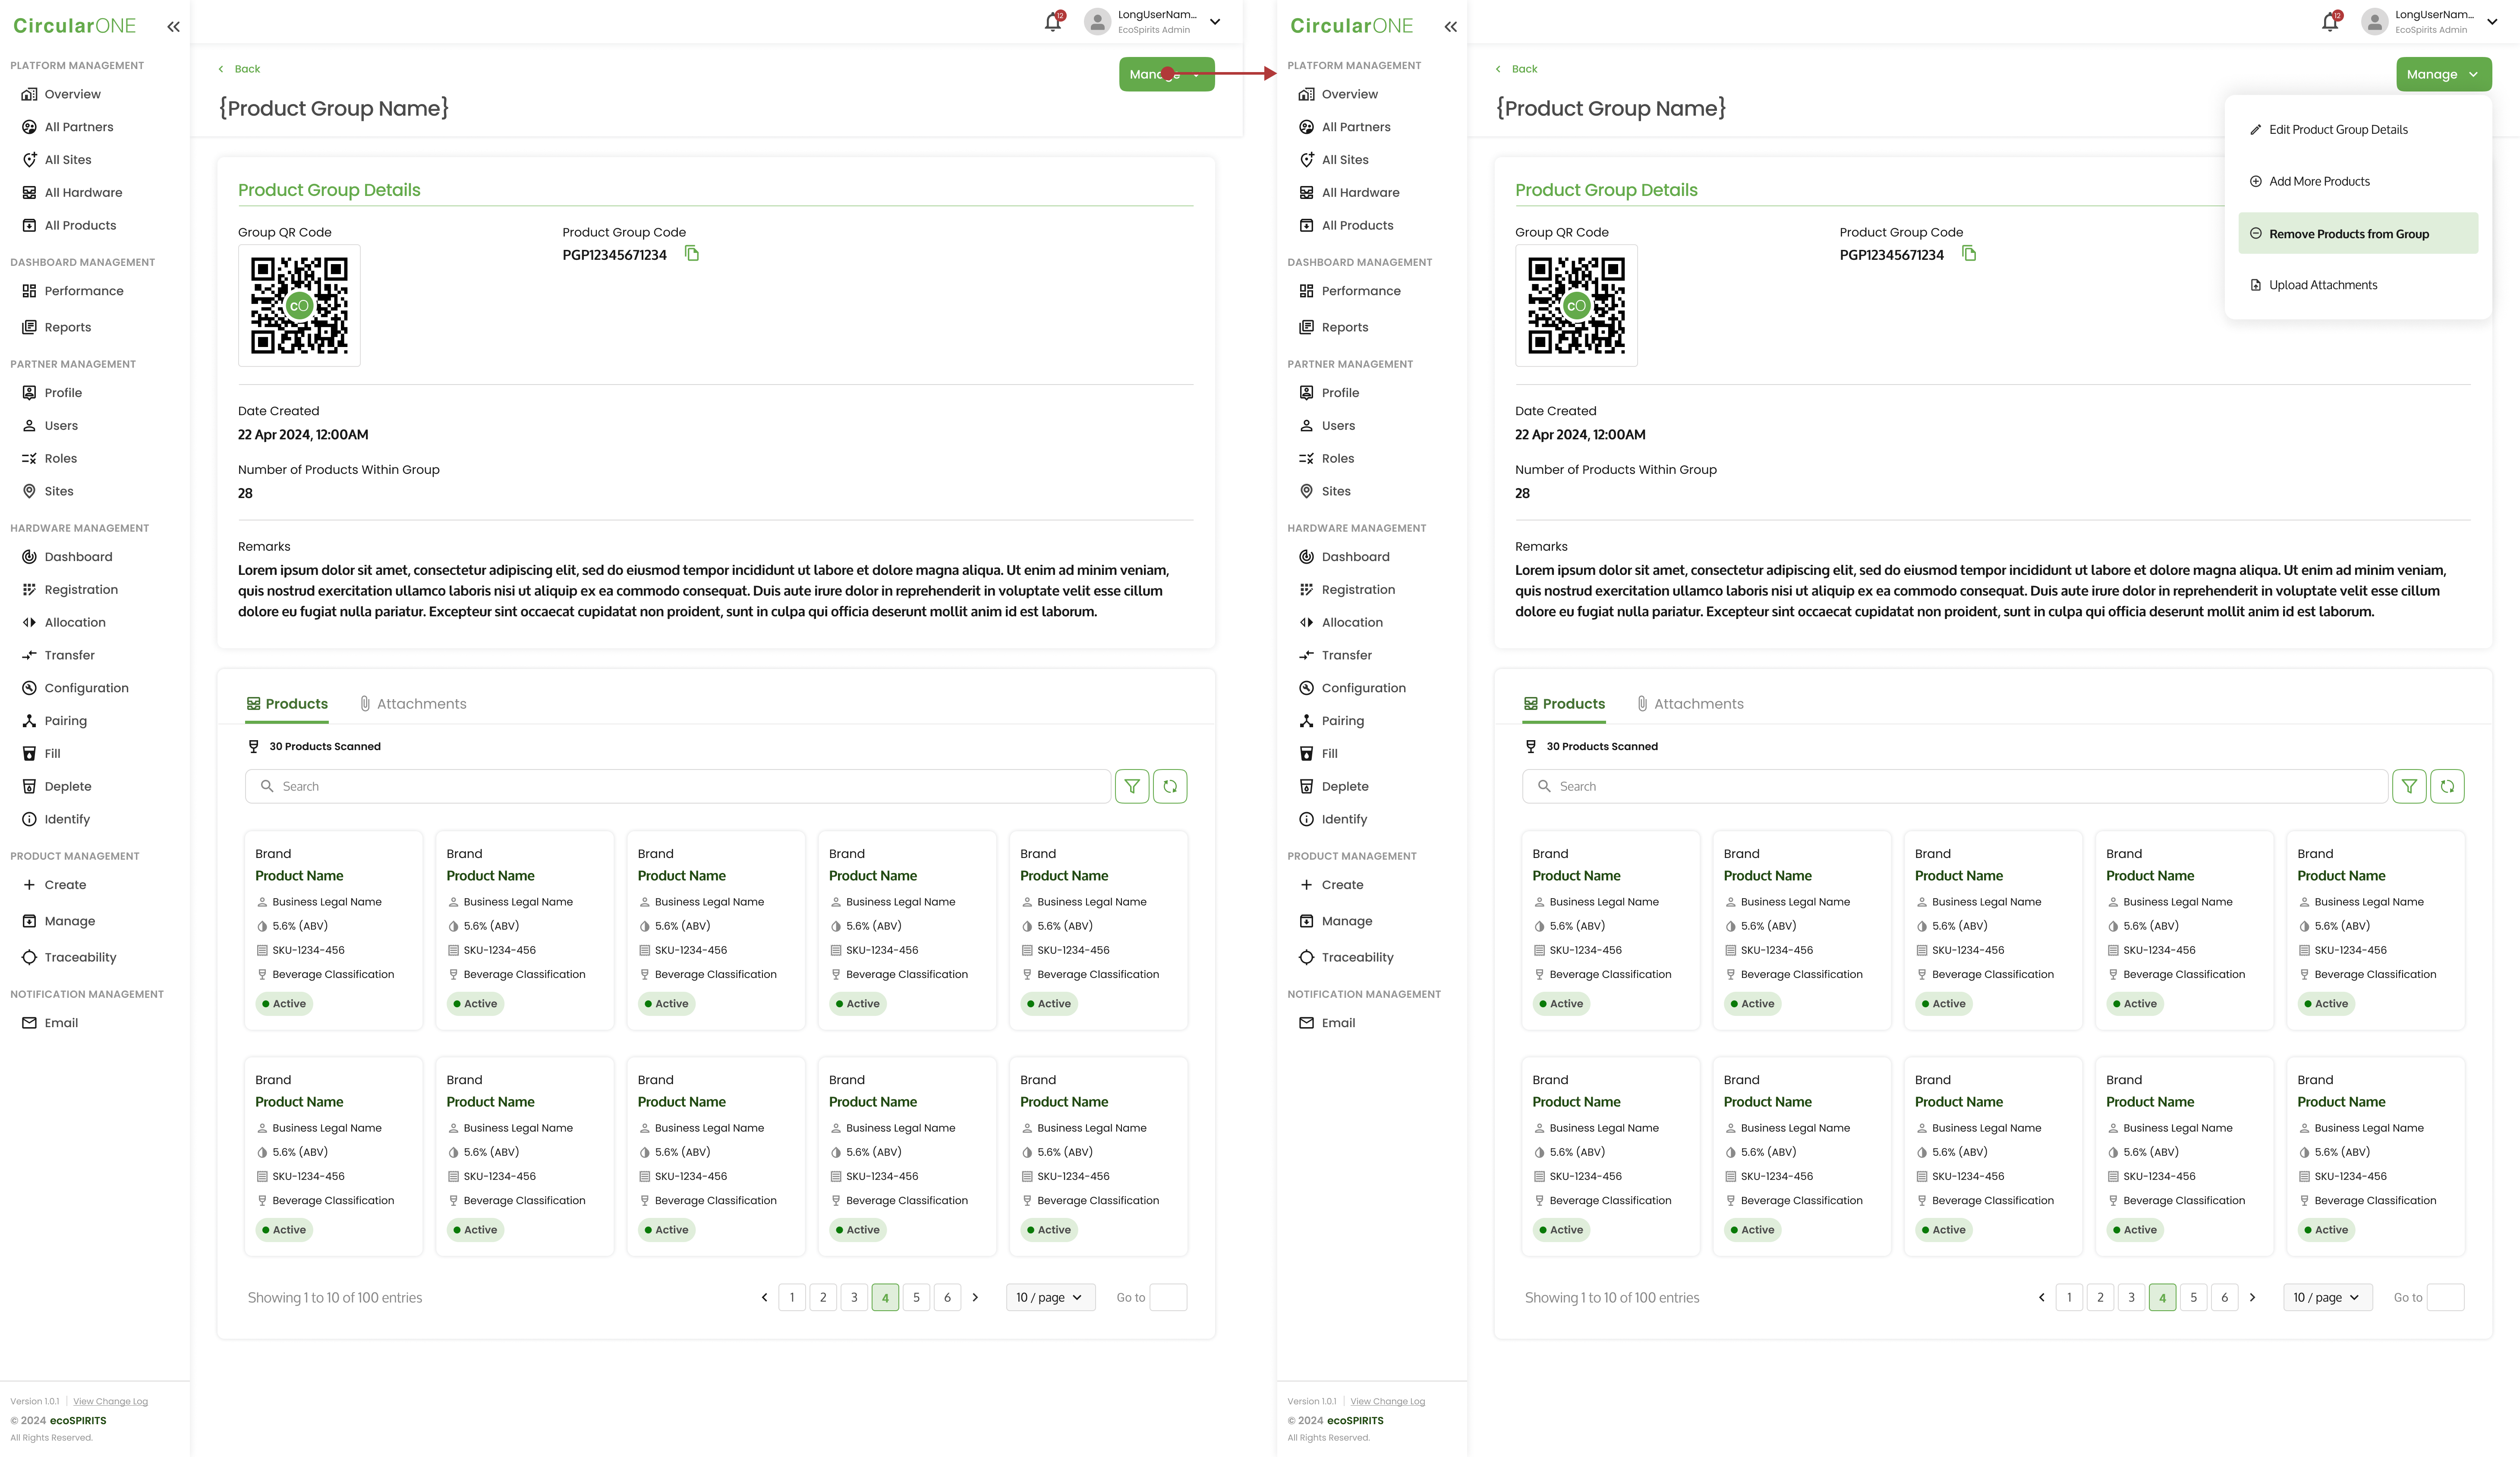
2 | Select ‘Manage’ and click 'on ‘Remove Product from Group’ | |
| ||
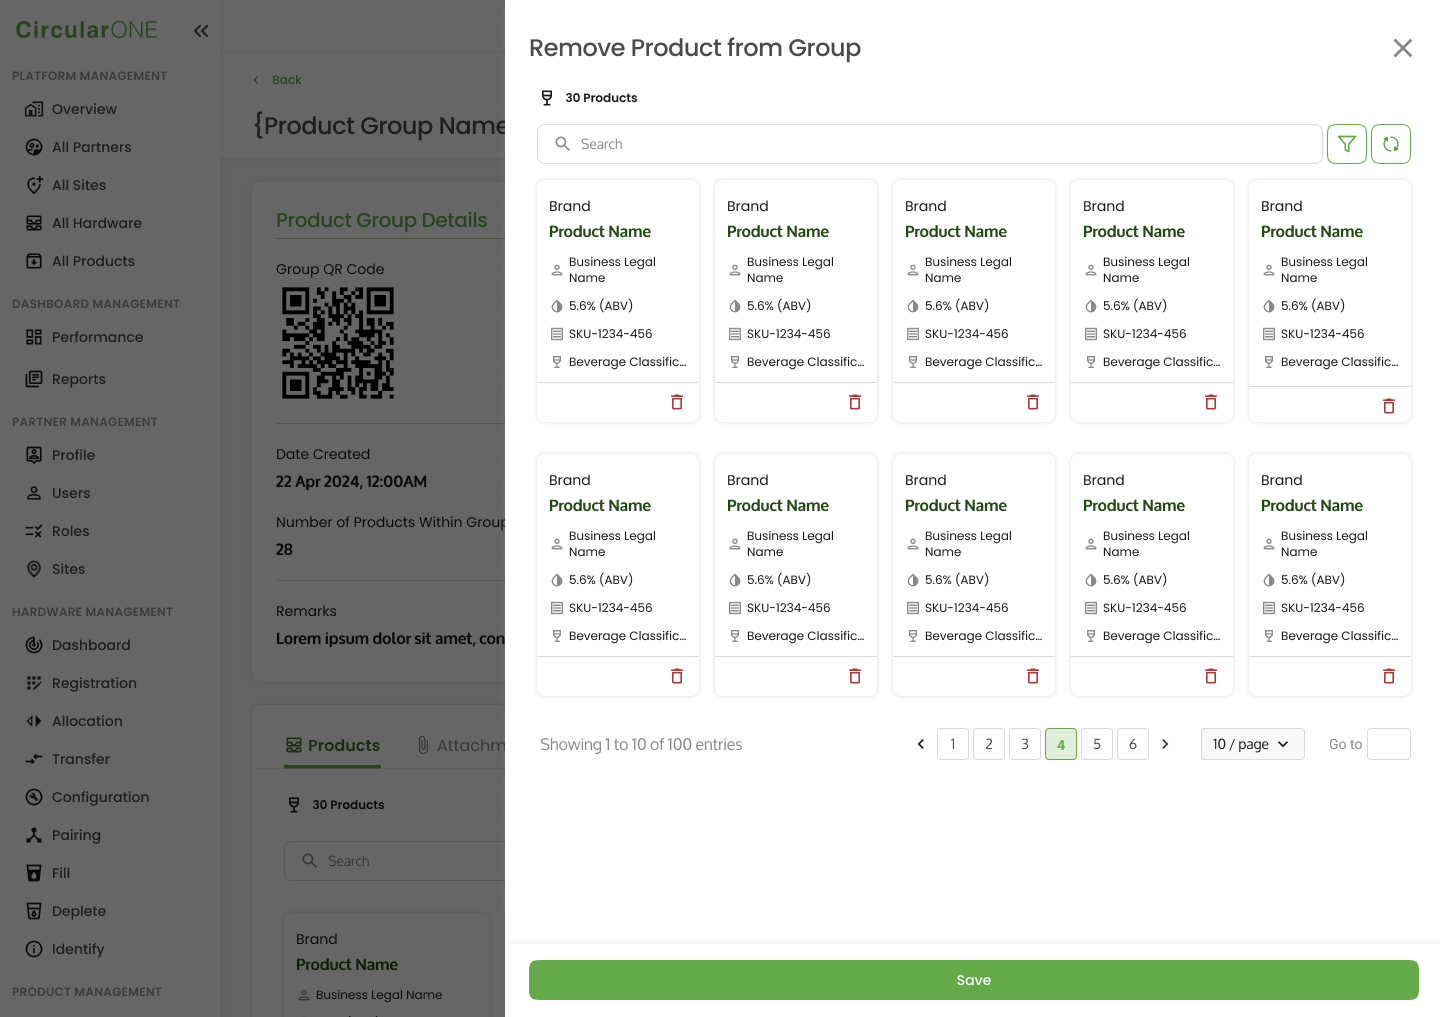
3 | Click on the ‘Delete’ icon of any hardware you wish to remove from the group and click ‘Save’ | |
| ||
4 | If successful, the hardware will be removed from the group | |
No comments to display
No comments to display